Welcome!

Room directory

Welcome to Paris!

We are delighted to welcome you! This website is here to help you settle into your new home and have the best possible stay in Paris. In addition to a detailed description of the amenities, no matter where you are in Paris, you can use the “Near Me” button below to find a selection of restaurants, landmarks, the latest exhibitions, activities, and more…

Please feel free to contact us if you have any questions or requests!

Have a nice stay,

Fabienne & Olivier

Essential Information

– Address: 13-15, rue de l’Amiral Roussin, 75015 Paris (map).
– WiFi : JayNetwork, pass: dealwith66

There are fans available that you can plug in wherever you want.
For heating, each radiator is equipped with a control knob.

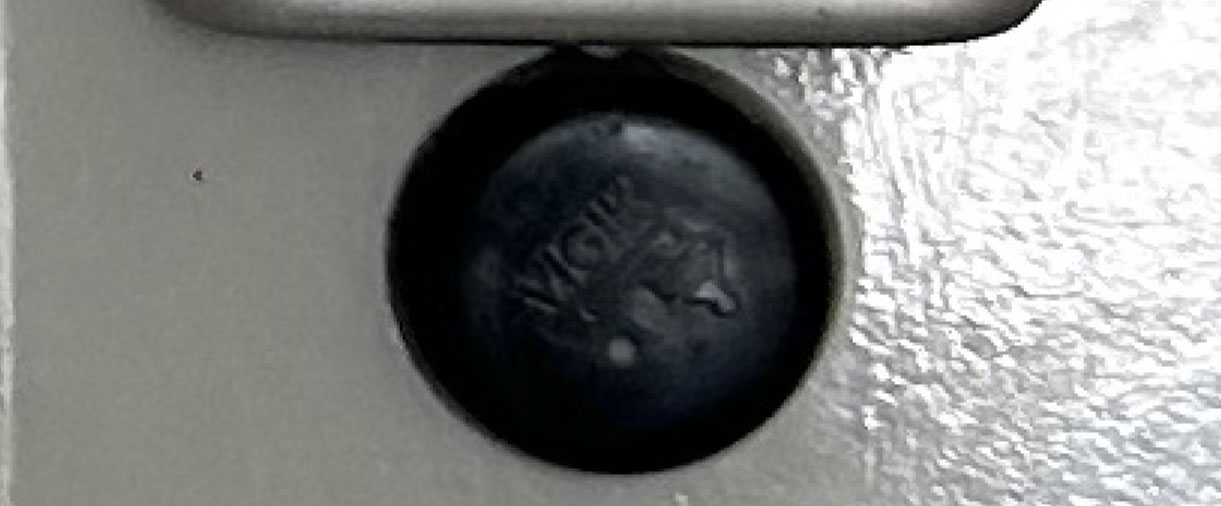
Next to the intercoms or some of the elevator buttons, you’ll see these black plastic circles. Tap your badge on it to unlock the door or elevator.
A small green light tells you if it’s open.

A Few Rules

This apartment is our home, so you’ll find some of our personal touches, toys, and so on. Feel free to play, read, or use items from the kitchen cabinets; please put everything back where you found it and, if necessary, replace it!

  • Take good care of your keys! For a stuck key, a key broken in the lock, a lost key, or a door opening service, the price will be provided by the locksmith. If you leave your keys inside while you’re staying here, please call us so we can come and help you out.

  • Please be considerate of your neighbors’ peace and quiet! The volume inside and outside the home must be kept under control throughout the day. It is PROHIBITED to make noise in the evening after 10 p.m. and before 9 a.m. Parties are strictly prohibited.

  • Please observe the maximum number of people allowed.

  • Be sure to keep the furniture and decorations in good condition. If anything is damaged or broken, you will be charged for it. Do not clog the toilet; a plumber’s service will be billed according to the plumber’s estimate.

  • Apartment security: be sure to lock the door to your apartment. You are responsible for any theft or damage.

  • Smoking is not allowed in the apartment, except on the balcony. You’ll find an ashtray there. Don’t forget to empty it regularly into the building’s trash can using a plastic bag (not into the kitchen trash can).

  • Do not unplug or rearrange any electrical outlets, lamps, or connections that are already in place (yes, it really has happened)! You can use the many power strips available.

In case of extreme heat

Create a draft

In addition to fans, one of the best ways to cool down your apartment is to create drafts. Use the doorstops (which you’ll find above the radiator in the living room) and open the windows in the living room and the bedrooms!

Leave the shutters partially closed

Open the shutters all the way at night to enjoy the cool air, and during the day, leave them almost closed.

How to Use the Ceiling Fan in the Bedroom

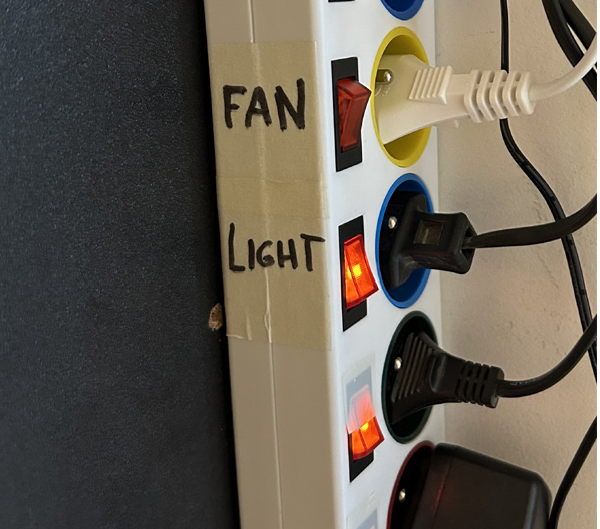
There are many fans available. In one of the bedrooms, there’s one hanging from the ceiling. To use it, simply flip the switch on the power strip near the bedroom door.

Before You Go

Please be sure not to leave anything behind and to leave the place clean for the next guests!

Access to the apartment

Nearest subway stations:
– Cambronne, line 6 (map).
– la Motte-Picquet Grenelle, lines 6, 8 and 10 (map).
– Emile Zola, line 10 (map).

Nearest parking lot:
Parking Cambronne, 26 Villa Croix Nivert, 75015 Paris (map).

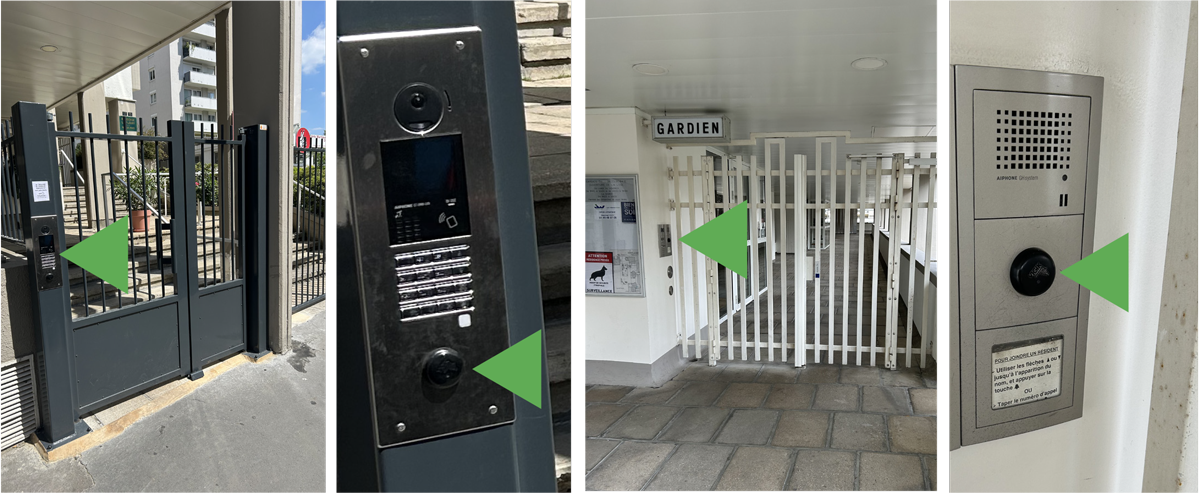
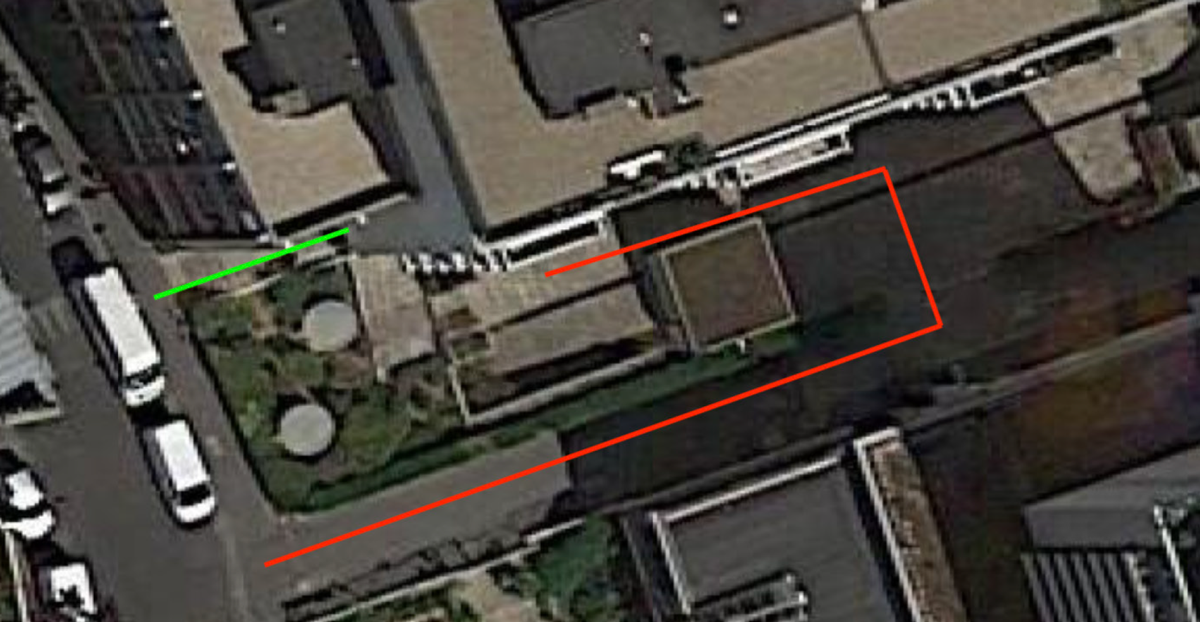
– To enter the apartment, use the badge to open the black gate by pressing the small black circle located below the intercom. Climb the few steps to the white gate. Use the badge along with your keys to open the gate by pressing the small black circle next to the intercom.

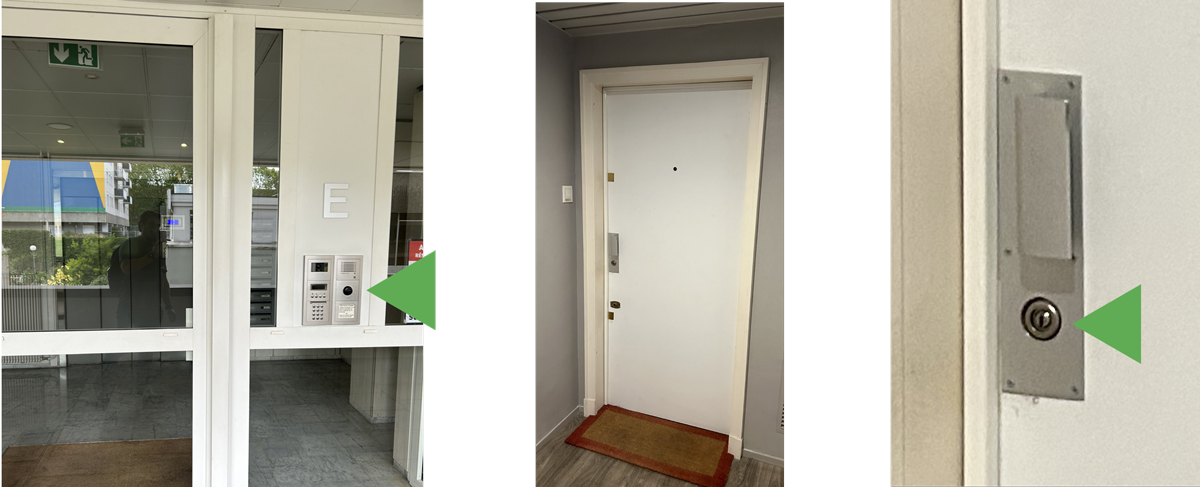
– Once you’ve passed through the gate, take the first door on the left to Building E, using your badge there as well.
– Take the elevator to the 5th floor.
– The apartment door is on the right as you step out of the elevator. To open it, insert the key into the lock and turn it to the right (a little more than two full turns).

Additional access via Level -1

Across from the elevator, on Level -1, there is an exit. You can also enter the building this way (you still need your badge). Advantage: there are no steps…

Bedrooms and closets

In the blue room and the orange room, the beds can be arranged as two double beds, four single beds, or two single beds stacked on top of each other.
By default, the beds are set up as double beds. To separate them, lift the mattresses and locate the black fabric tabs—secured with snaps—that hold the two bed bases together. Unhook them and separate the beds.
If you don’t need 6 sleeping spots, you can stack the beds. The process is easier if you first remove the mattress from the bed and place it on top of the other one.
Before you leave, if you have rearranged the beds, please put them back the way they were when you arrived.

Next to each window, you’ll find a hanging bar with a fold-down handle that allows you to open and close the roller shutters.

In the blue room and the orange room, you’ll have access to the bottom drawers and closet in both white dressers to store your belongings.
Please do not touch the boxes stored on top of the furniture.
In the white bedroom, you’ll find a white dresser where you can store your belongings.

You’ll have access to the part of the closet in the hallway that’s across from the door to the main bathroom (the one with the washer and dryer). There you’ll find an ironing board and an iron, some cleaning supplies, and a closet to hang your coats.
You can also put your empty suitcases there if you’d like.

If you’re here on a Wednesday or Sunday, feel free to water the plants on the balcony, especially if it’s hot! Thank you!

Living Room

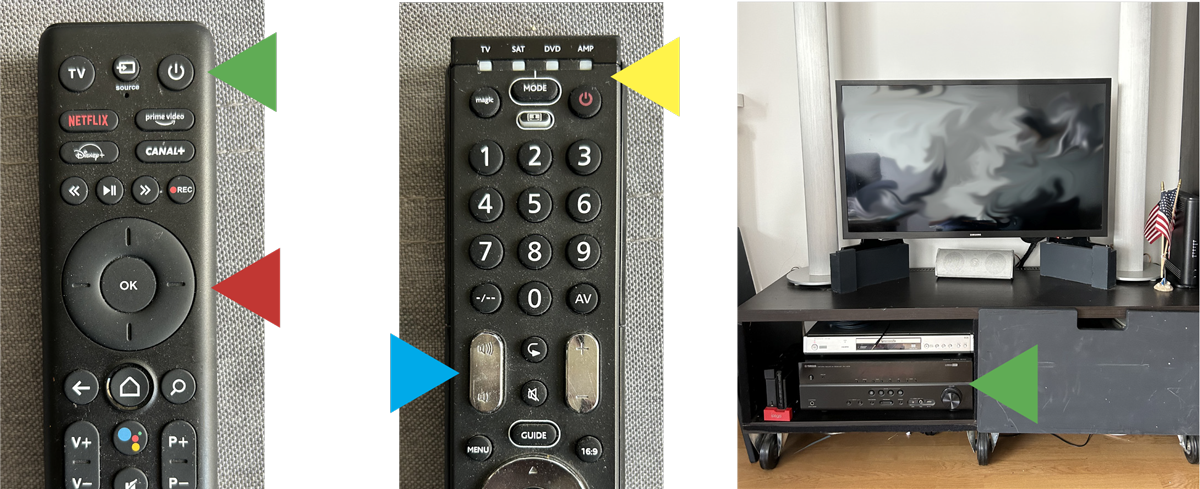
On the left: remote control 1. In the middle: remote control 2. On the right: the amplifier is indicated by the green arrow.

To turn on the TV, press the on/off button on remote control 1 (green arrow). This will turn on the screen and the amplifier. Use the buttons marked with the red arrow to navigate through channels and apps; you can adjust the volume using the buttons marked with the blue arrow on remote control 2.
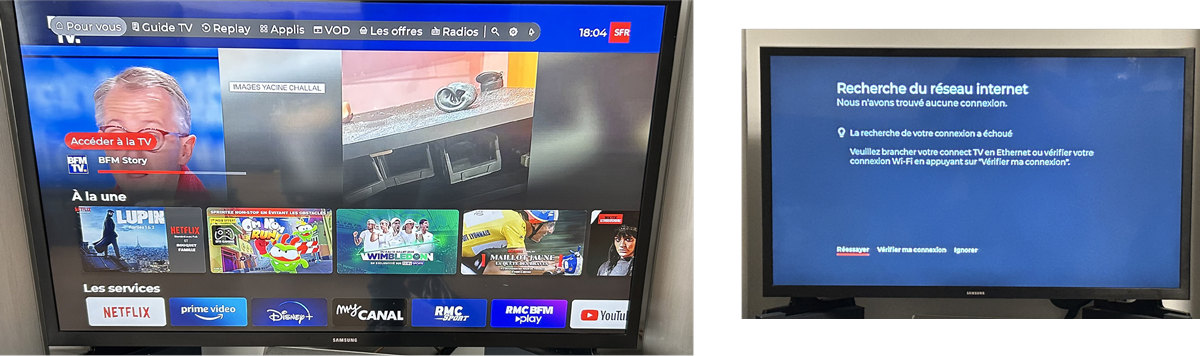
The screen should look like the one on the left. If the screen looks like the one on the right, press the “OK” button on remote control 1 until you reach the screen shown above.

Press the “OK” button on remote control 1 when “Access TV” is highlighted in red to access the TV channels. Use the number keys or the P+ and P- buttons to change channels.
If you have accounts, you can use apps such as Netflix, Prime Video, or Disney+. Don’t forget to log out at the end of your stay.

If the screen does not look like the illustration above:

First, check to see if the amplifier is turned on. If that’s not the case, pick up remote control 2. Press the “Mode” button (blue arrow) until the indicator light under “AMP” turns blue, then use the on/off button located just below it (green arrow).
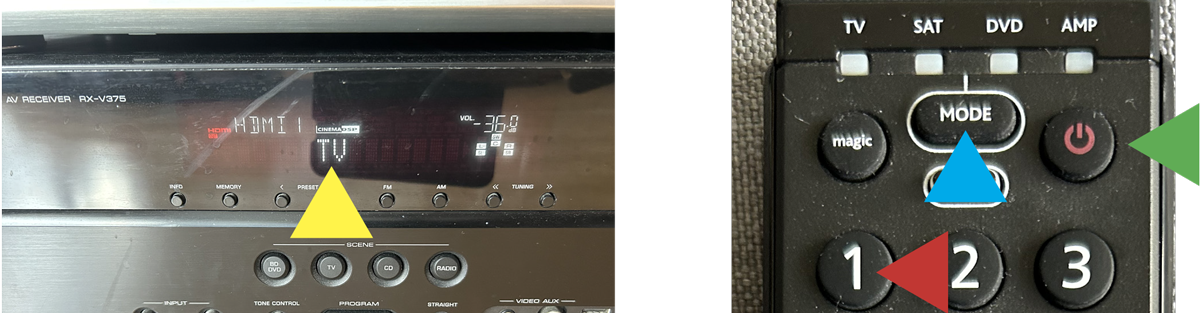
Next, check to see if the amplifier displays the word “TV.”z If that’s not the case, pick up remote control 2. Press the “Mode” button until the indicator light next to “AMP” turns blue. Then press the 1 key (red arrow). The amplifier will then display “TV,” and the correct images will appear on the screen.
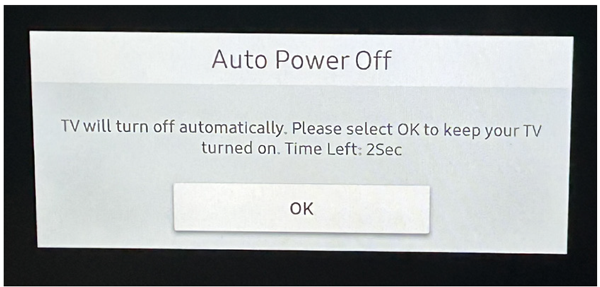
If you see the message above on the screen, pick up remote control 2. Press the “Mode” button (blue arrow) until the indicator light under “TV” turns blue, then press the “OK” button on the remote control.

If you can’t hear any sound, check next to the word “TV” on the amplifier’s display: you should see small white rectangular icons (3 or 5), indicated by the green arrow in the illustration (2). If they are displayed, adjust the volume using the buttons marked in blue on remote control 2. If the icons aren’t displayed, turn the amplifier off and then back on. To do this, take remote control 2, press the “Mode” button until the indicator light next to “AMP” turns blue, and then press the on/off button located just below it twice.

On the left, the amp’s screen with the white rectangular icons. On the right, the amp’s screen without the white rectangular icons.

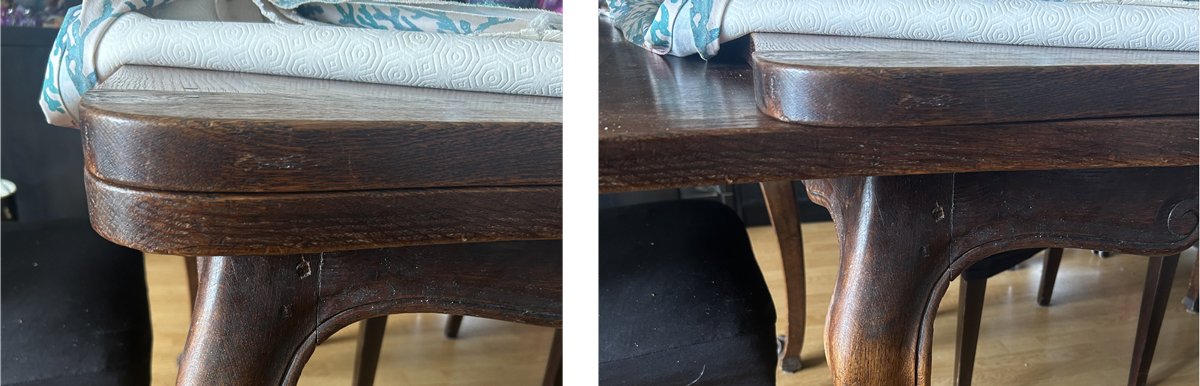
You can extend the living room table to eat more comfortably, and use the chairs from the balcony. To do this, lift the tablecloth. You’ll see that there are extension leaves under the main tabletop that you can pull out.

To return the table to its original state, we recommend standing facing the extension leaf, lifting the main tabletop slightly, and pushing the extension leaf with your hips until it is completely tucked away.

Please be sure to fold the table back down before you leave!

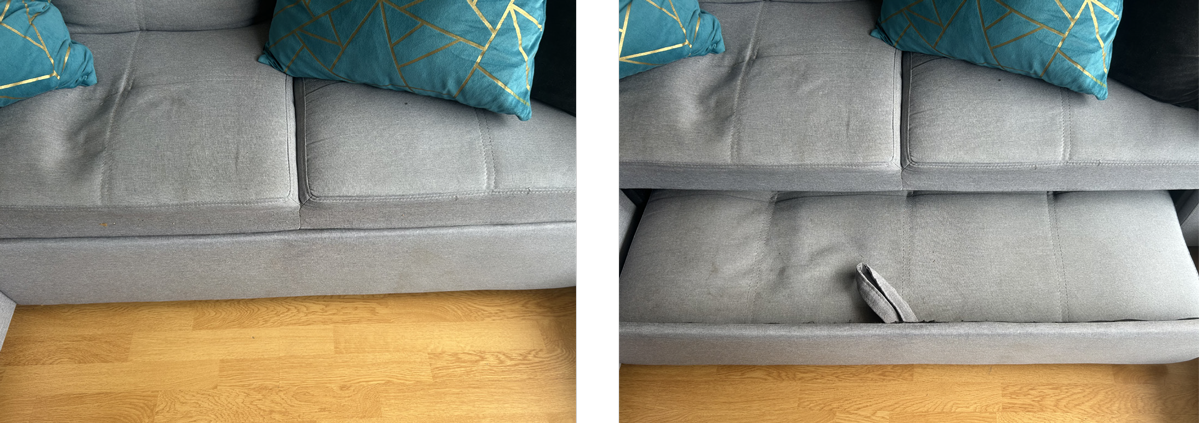
If you need an extra place to sleep, you can use the living room sofa as a guest bed. To install it, follow these steps.
First, unfold the sofa by pulling on the bottom part. Pull toward you and upward, and when you reach the end of the range of motion, push downward while continuing to pull toward you.

Between the closet and the radiator in the living room, you’ll find a mattress pad, a comforter, and two pillows. You can also remove the cushions from the sofa (they’re attached with Velcro); then, if you’d like, you can also remove the backrests themselves by sliding them forward. Be careful—they’re a little hard to move.

Please be sure to return the sofa to its normal position before you leave!

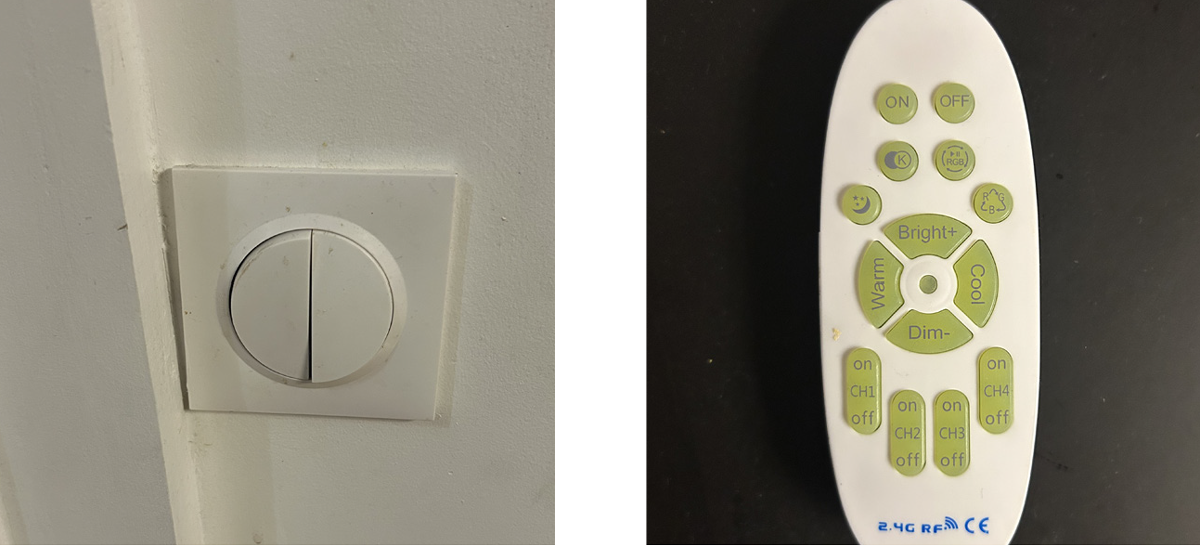
At the entrance to the living room, on the column, the switch on the left is for the ceiling light, and the one on the right is for the fan near the window.
The ceiling light comes with a remote control that lets you adjust the temperature and brightness of the light.

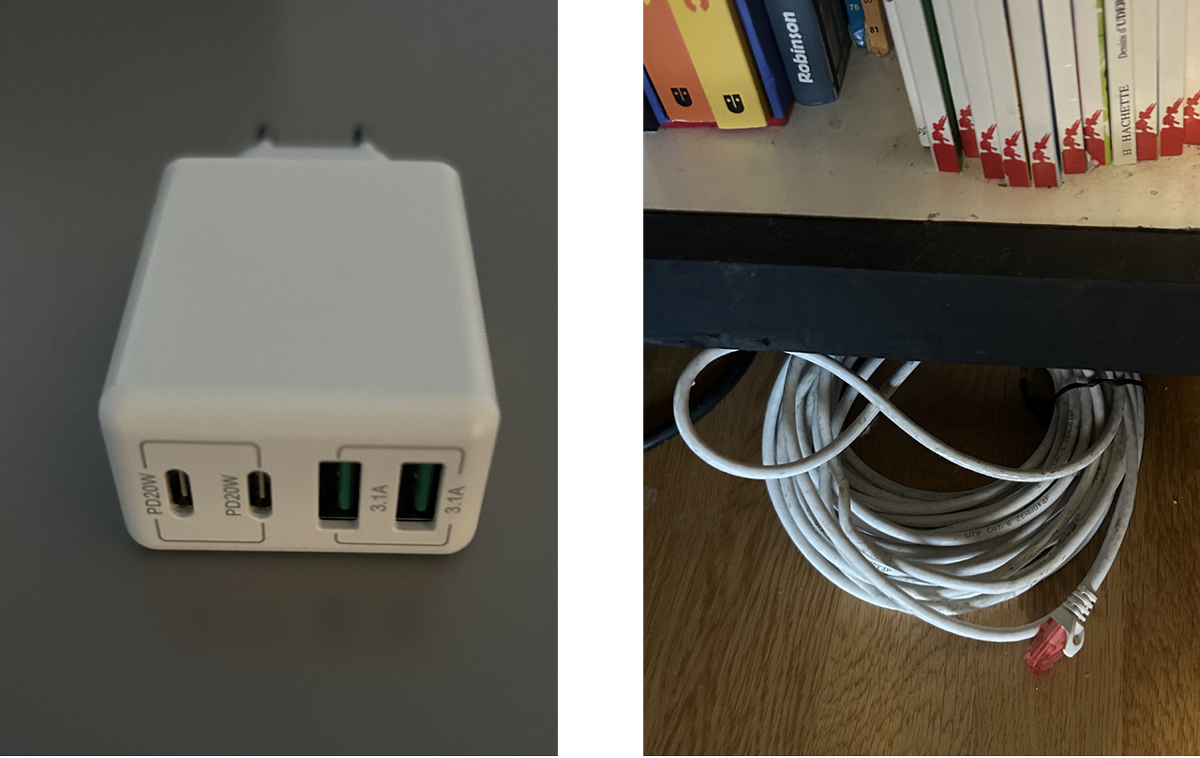
There are two chargers available with multiple USB ports for your electronic devices. Please leave these for the next guests!
If you need a (very) fast internet connection, there is also an RJ-45 Ethernet cable available under the library that you can simply plug into your computer.

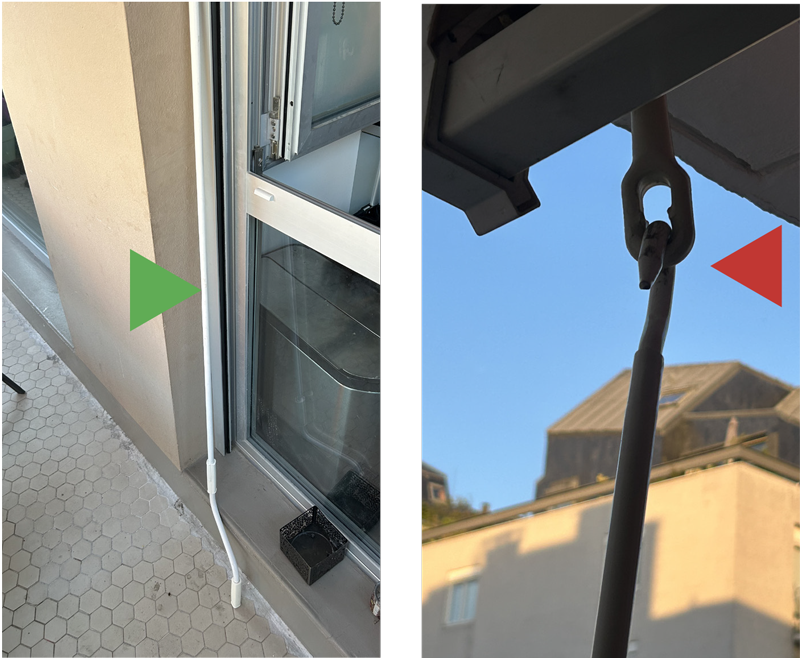
– To use the awning on the balcony, first find the large white handle (in the kitchen, behind the trash can).
– Attach the large white handle to the designated spot on the left side of the blind.
– Turn the handle to raise or lower the blind.
– Remove the handle and put it away.

Otherwise, feel free to water the plants if they need it!

Cuisine

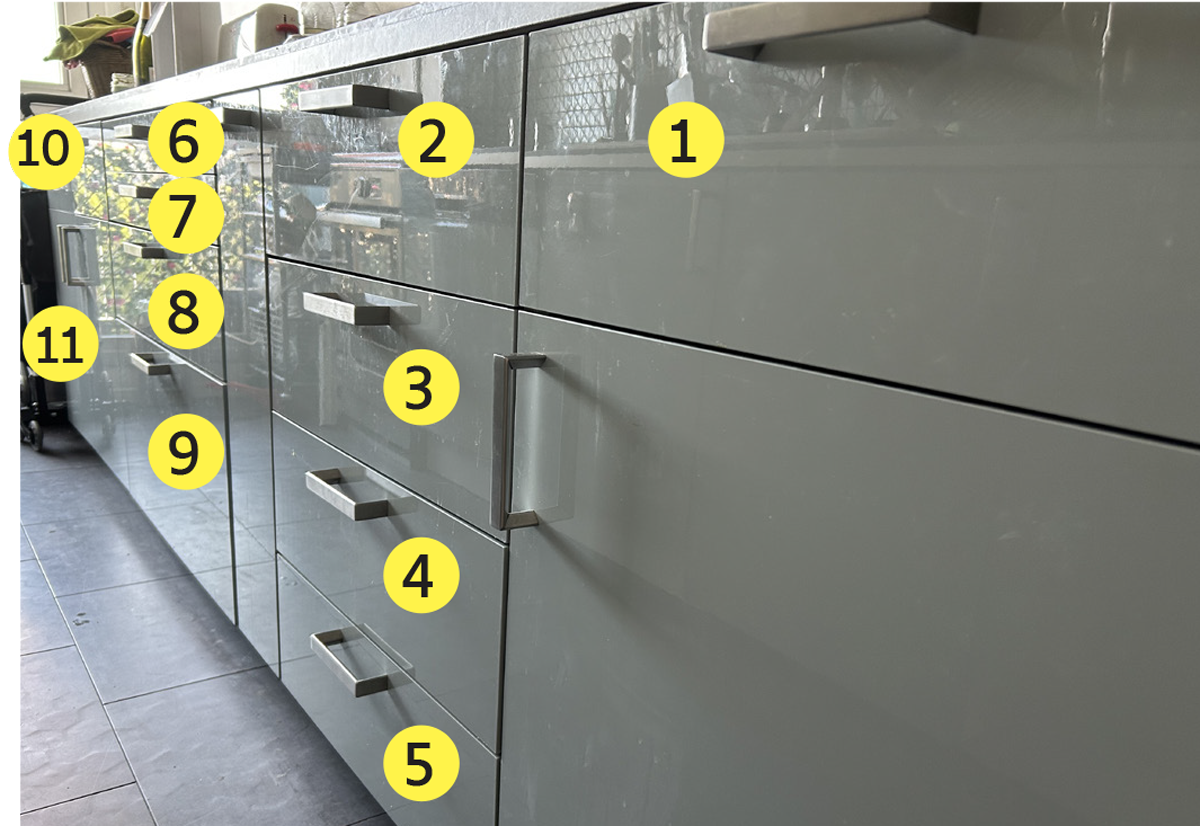
1 – Glasses
2 – Cutlery
3 – Plates
4 – Salad bowls / bowls / Tupperware containers
5 – Kitchen Appliances
6 – Trivets / Cutting Boards
7 – Kitchen Utensils
8 – Pots and Pans
9 – Oven-safe dishes
10 – Spices, salt, pepper…
11 – Lids for pots and pans, various dishes

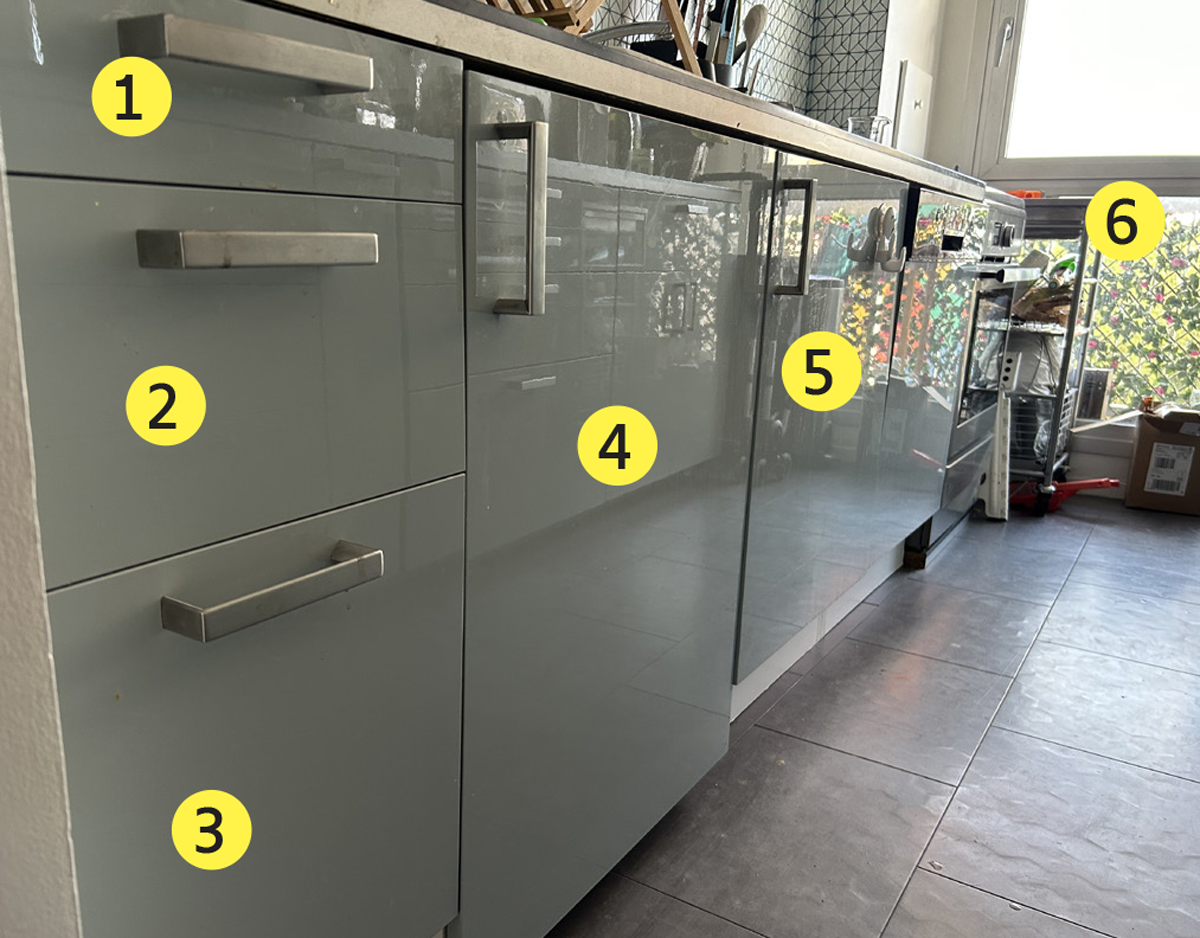
1 – Sugar, tea
2 – Cups and mugs
3 – Paper towels, milk
4 – Kitchen Appliances
5 – Cleaning Products
6 – (drawer of the metal serving cart) aluminum foil, parchment paper, trash bags

Almost everything goes in the dishwasher, except for frying pans, pots, and a few mugs and glasses.

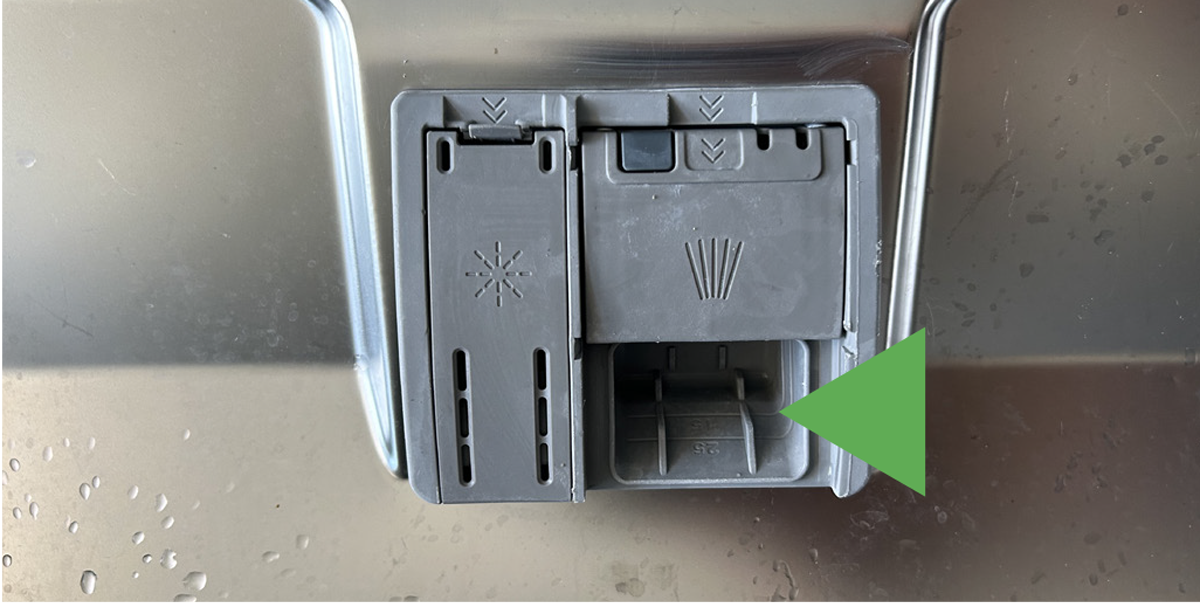
– Open the dishwasher and place a tablet in the dark gray compartment provided for that purpose.

– Close the compartment and the dishwasher.

– You can find dishwasher tablets in the cabinet above the microwave.

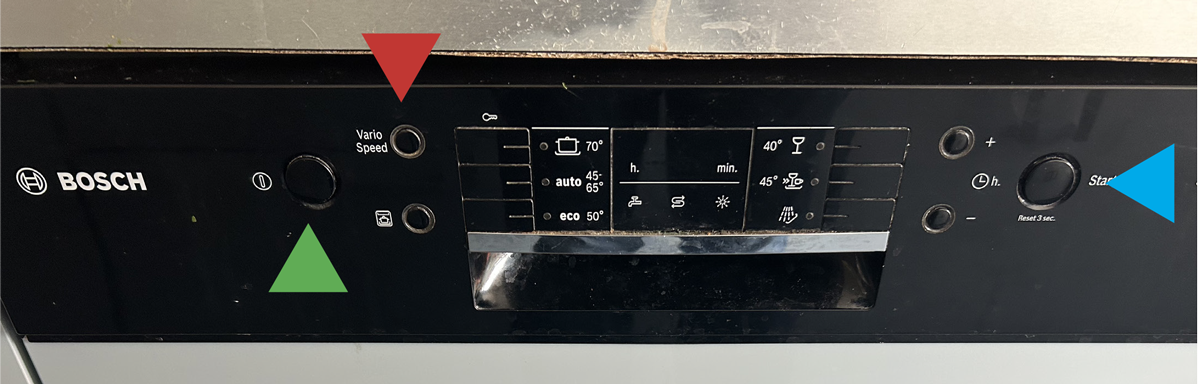
– To turn on the dishwasher, press the button indicated by the green arrow. A red light comes on next to “eco,” and 2:20 flashes on the screen.

– If it’s nighttime, press the “Start” button marked with a blue arrow.

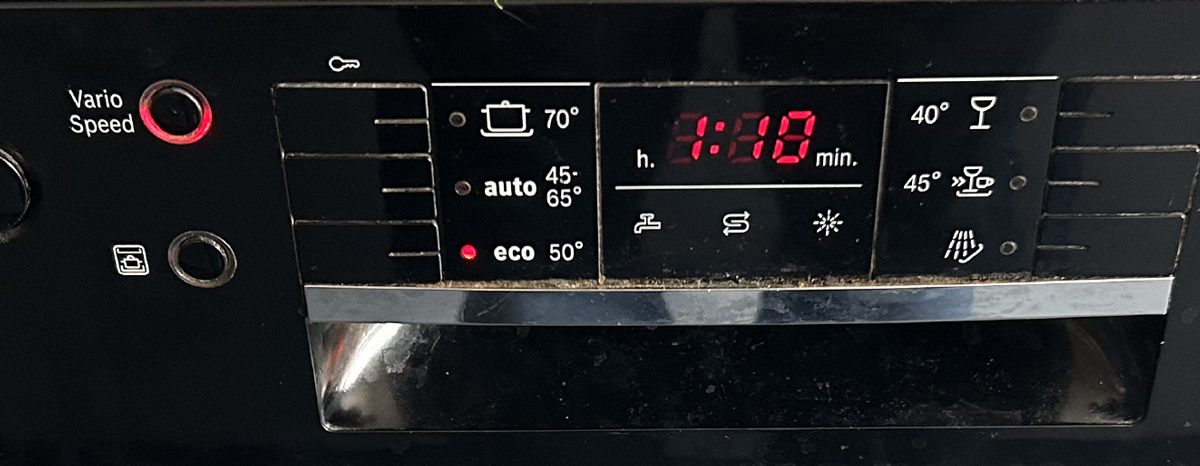
– If you’re washing during the day and want a faster cycle, press the “Vario Speed” button marked with a red arrow. The display on the screen changes to 1:10, and the button is highlighted in red. Then press the “Start” button.

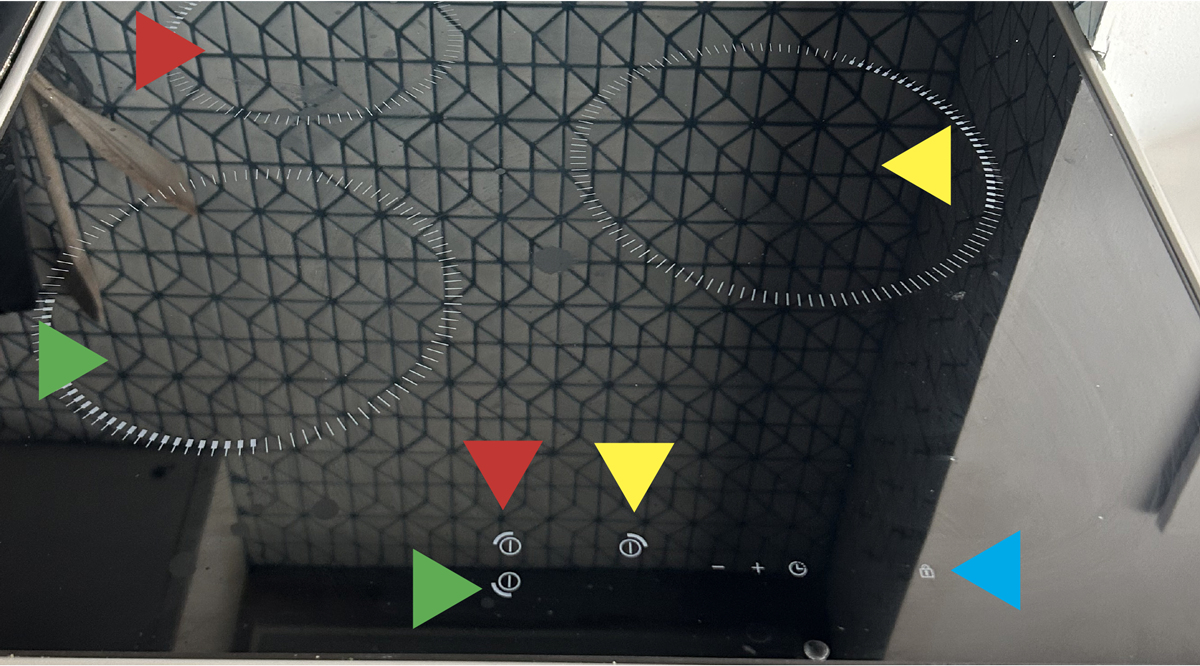
The cooktops are induction. So be careful not to leave any metal objects on it.
– To turn on a burner, press the corresponding button with the on/off symbol.
– Next, adjust the power using the + and – buttons; numbers will appear.
– When cooking is complete, press the on/off button on the hot plate until the number is replaced by an “H.”

If, when you try to turn on a cooktop, you hear beeps and see a red light flashing above the padlock icon (blue arrow), press that icon until you hear a long beep (the red light above it will turn off).

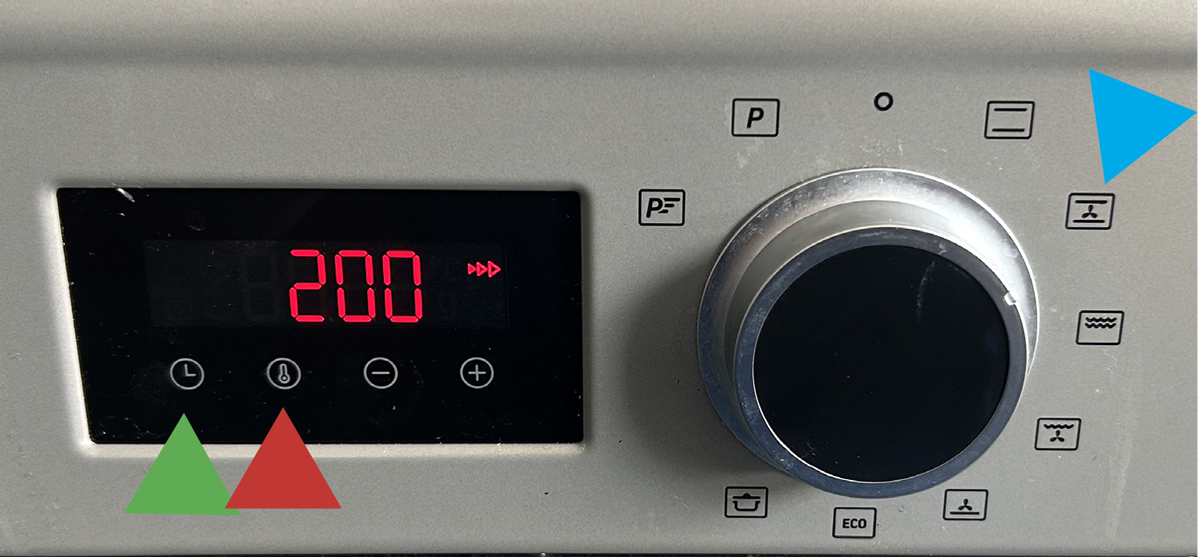
– Turn on the oven by turning the knob two notches to the right (the icon marked with a blue arrow).

– To adjust the temperature, press the button indicated by the red arrow, then press the + and – buttons. The oven will beep when preheating is complete.

– To set a timer, press the button indicated by the green arrow, then press the + and – buttons. Note: the timer does not start until preheating is complete.

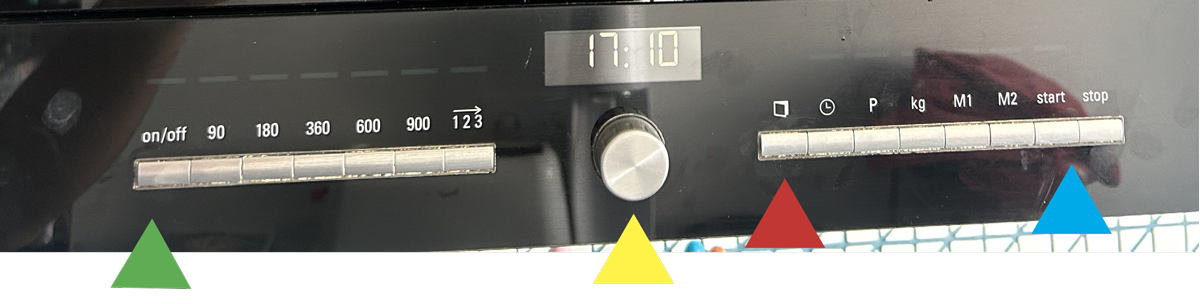
Mugs, coffee cups (except metal ones), and blue earthenware plates are all microwave-safe.

– Press the button indicated by the red arrow to open the microwave door.
– Press the “on/off” button (green arrow) to turn on the microwave.
– By default, the power setting will be set to 900. You can change it by pressing the appropriate keys.
– The rack inside the microwave can be removed if the item you’re placing inside is too large.
– Press the gray button indicated by the yellow arrow if it is not already extended, and turn it to select the operating time.
– Press the “Start” button to begin cooking or reheating.
– The microwave beeps when it’s done. Press the door-opening button again.
– Close the door and turn off the microwave by pressing the “on/off” button (green arrow).

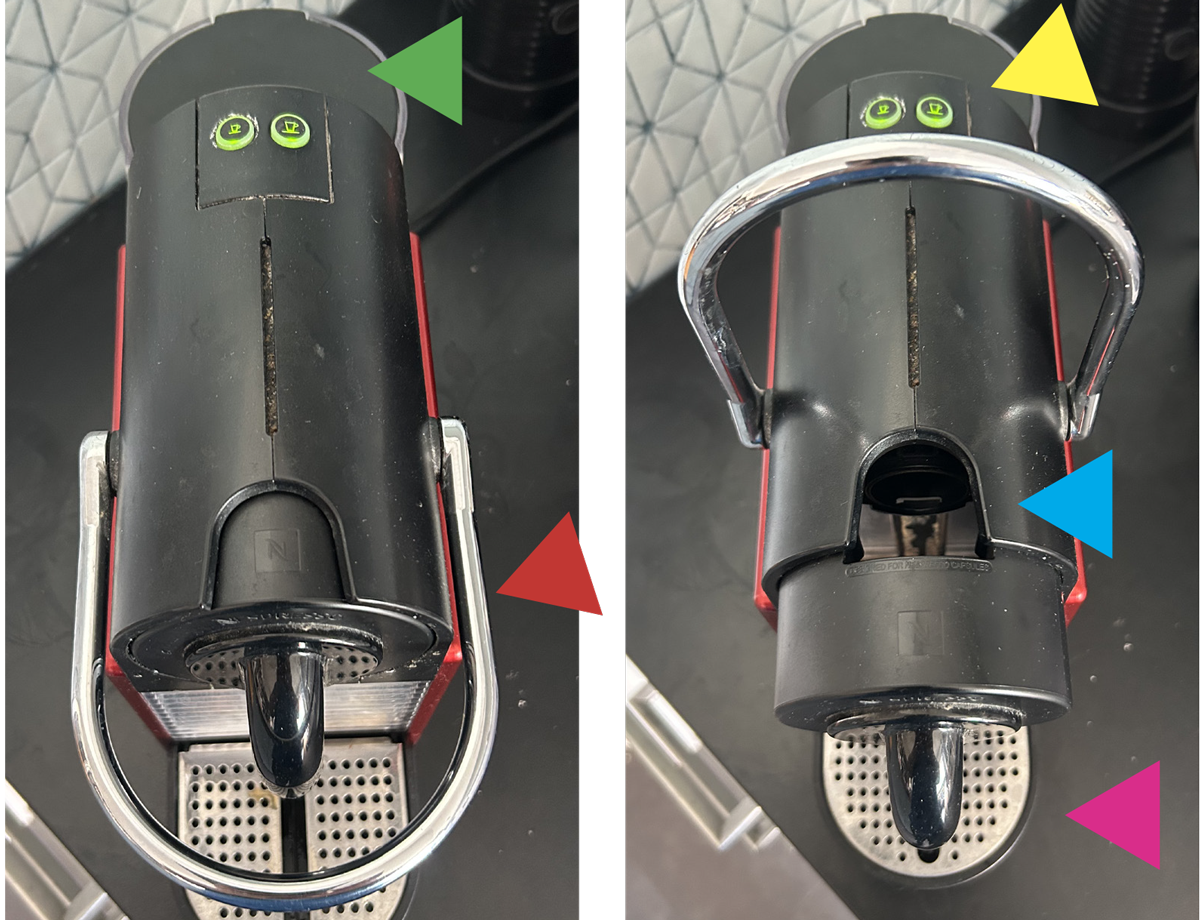
– Check to make sure there is enough water in the reservoir, located at the back of the machine. If that’s not the case, open the lid indicated by the green arrow and pour water into it.
– Open the capsule compartment by lifting the chrome handle (red arrow).
– Place the coffee capsule in the designated slot, with the flat bottom of the capsule facing toward you.
– Close the hatch by pushing the chrome handle down.
– Press one of the two buttons indicated by the yellow arrow. When they stop flashing, the machine is ready.
– Then press (briefly) the desired button (the one on the left makes a small coffee, the one on the right a large one). If you want a mug of coffee, you can press the buttons again.
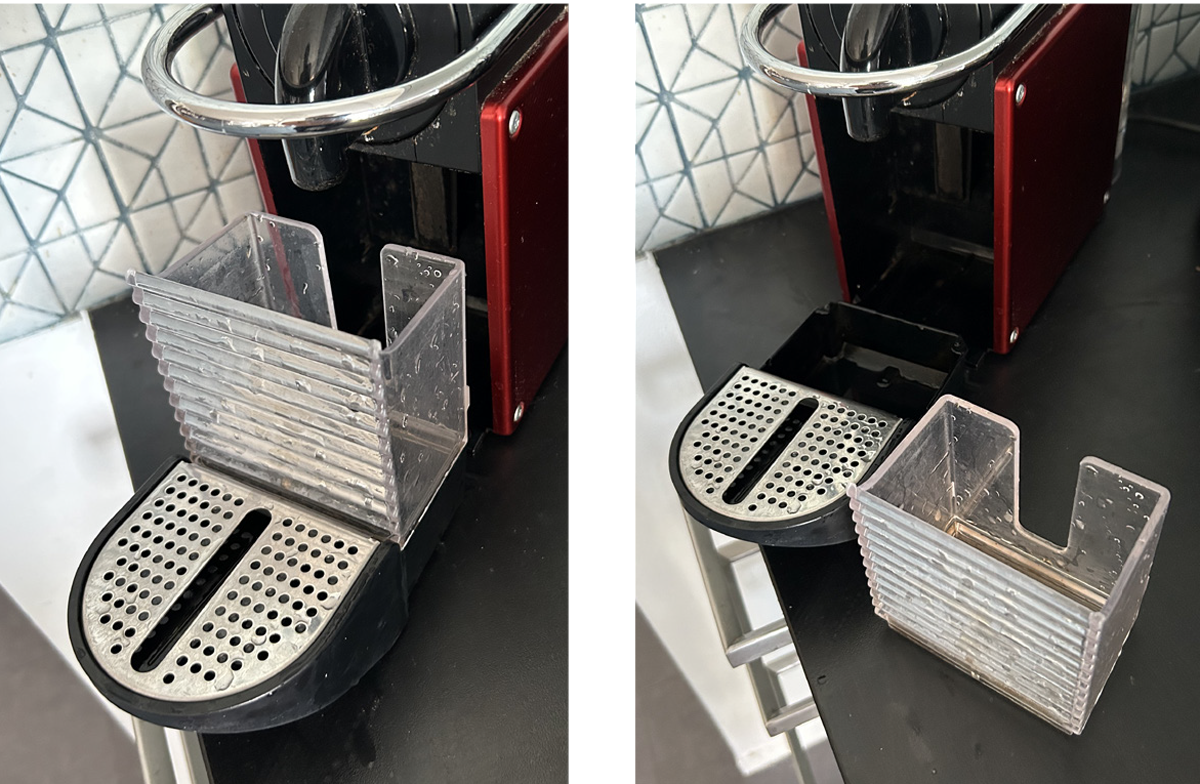
– The coffee stops flowing automatically. Take your cup and lift the chrome handle (this causes the used capsule to fall into the container below). Then close the handle.

If you can’t insert a capsule or close the door: grab the cup holder (purple arrow) and pull it toward you. You’re going to remove the used capsule container, which should be full. Empty it into the trash, then put everything back where it belongs.

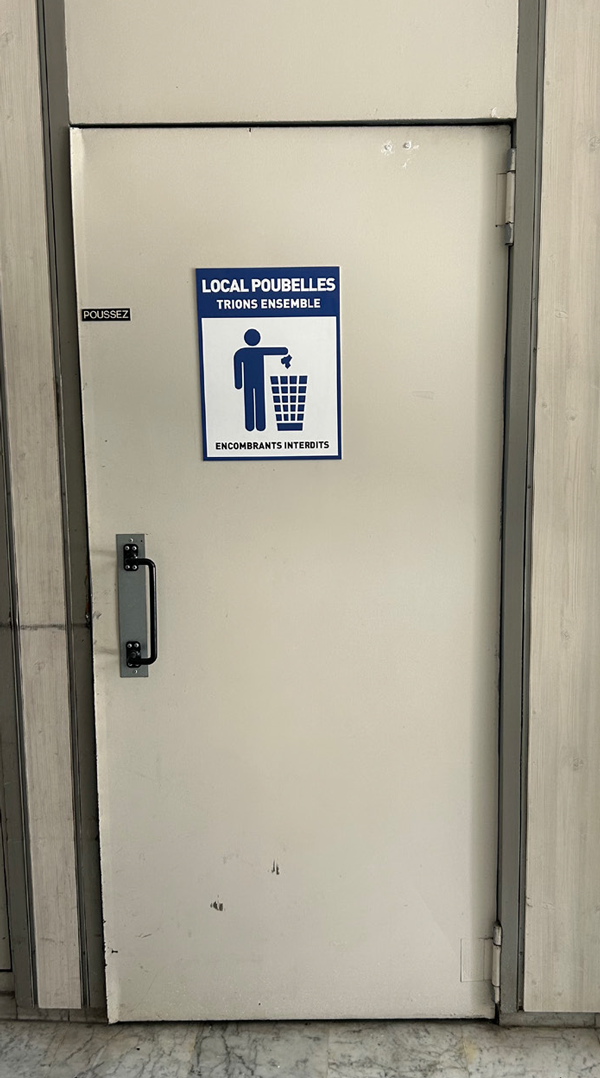
To get to the trash room, take the elevator to level -1. Just to the left as you walk out, you’ll see this door, behind which you’ll find the trash cans.

Signs tell you what type of waste to put in each trash can.
Please note: To use the elevator, you will need your building access card. Place it on the black circle below the call button, then press the call button.

Bathroom

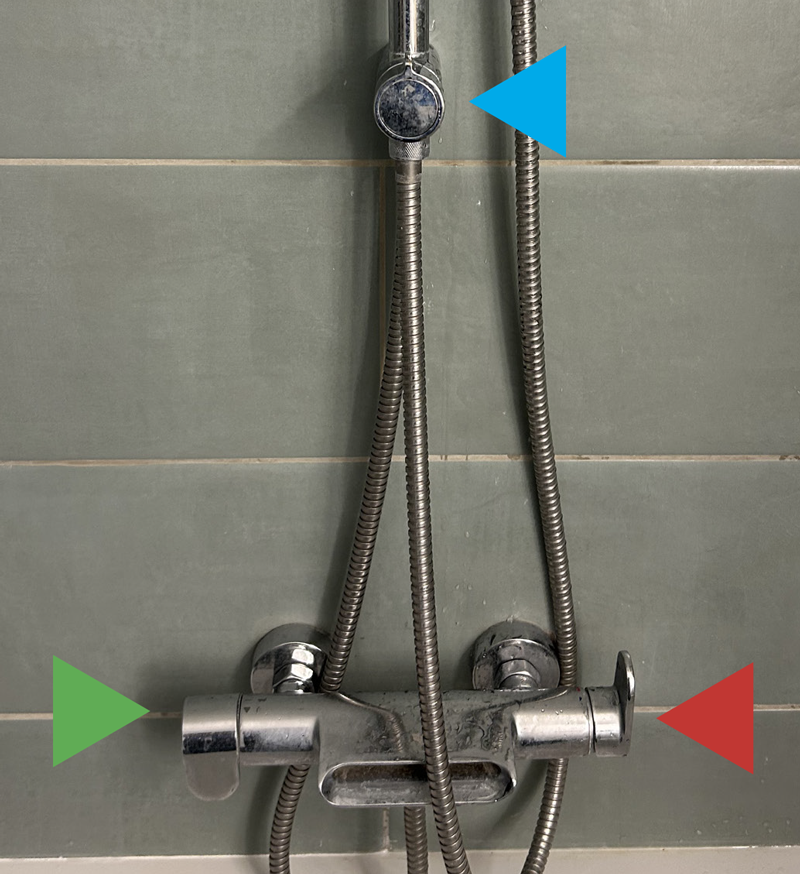
– The button indicated by the green arrow lets you switch between the faucet (upper position) and the showerheads (lower position).

– The button indicated by the blue arrow lets you switch between the movable showerhead (up position) and the fixed rain showerhead (right position).

– The button indicated by the red arrow controls the water flow and temperature.

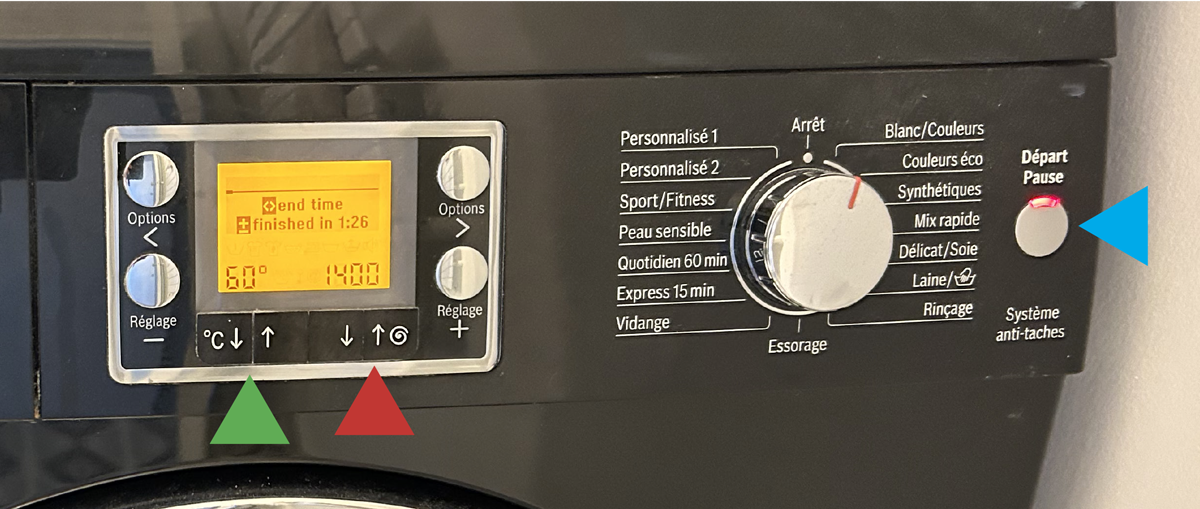
– To turn on the washing machine, turn the large silver knob. The first program on the right (“White/Colors”) is the most suitable.
– You can adjust the temperature using the buttons marked with a green arrow.
– You can adjust the spin speed using the buttons marked with the red arrow.

– You’ll find laundry detergent and fabric softener in the cabinet above the dryer.
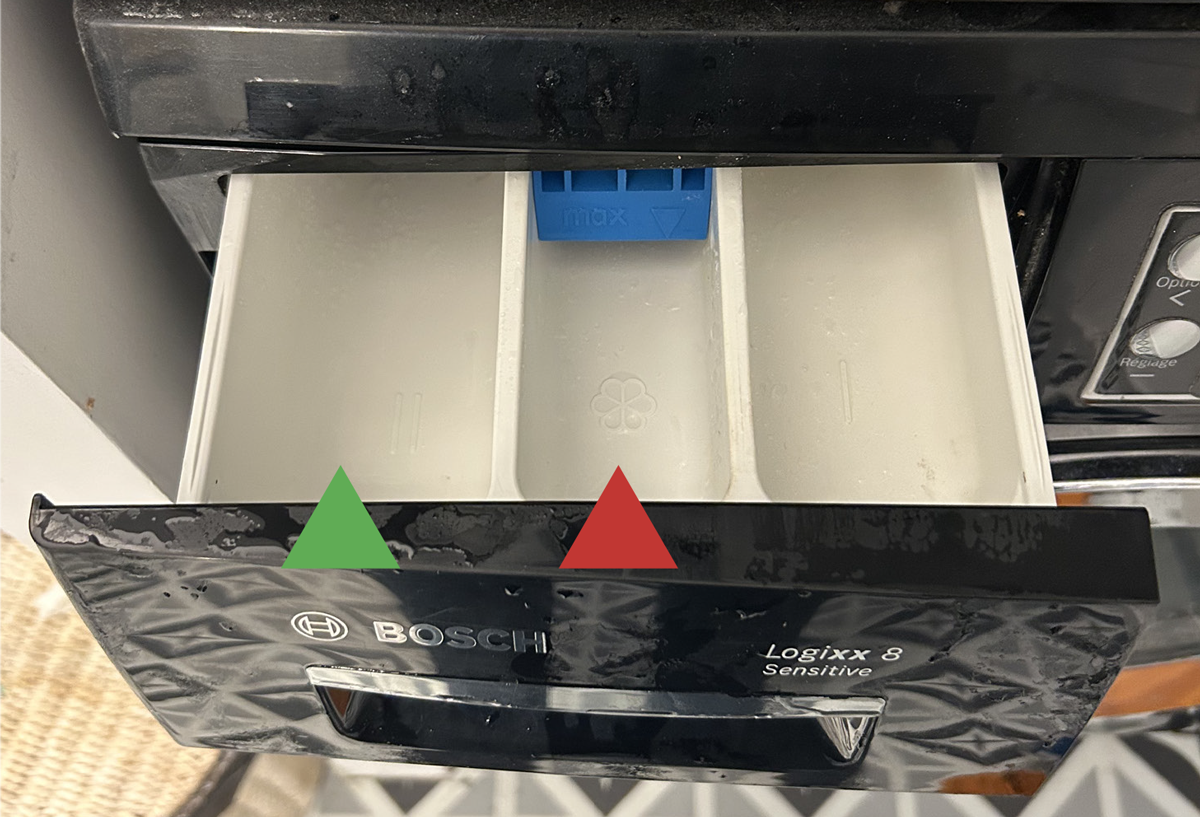
– Pull the drawer to the left. Pour the liquid laundry detergent into the compartment marked with the green arrow, and the liquid fabric softener into the compartment marked with the red arrow.
– Close the drawer.

– All you have to do now is start the machine by pressing the button indicated by the blue arrow (“Start/Pause”).
– Once the machine has started, you can press this same button to pause the wash cycle and add more laundry if the display shows “Top-up possible.” Press the button again to restart the wash cycle.

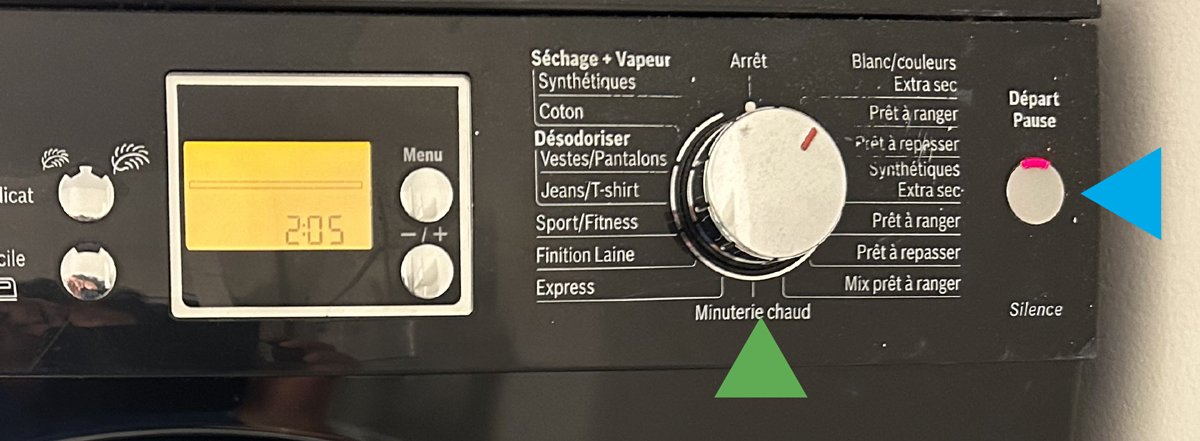
– To turn on the dryer, turn the large silver knob. The first program on the right is recommended.

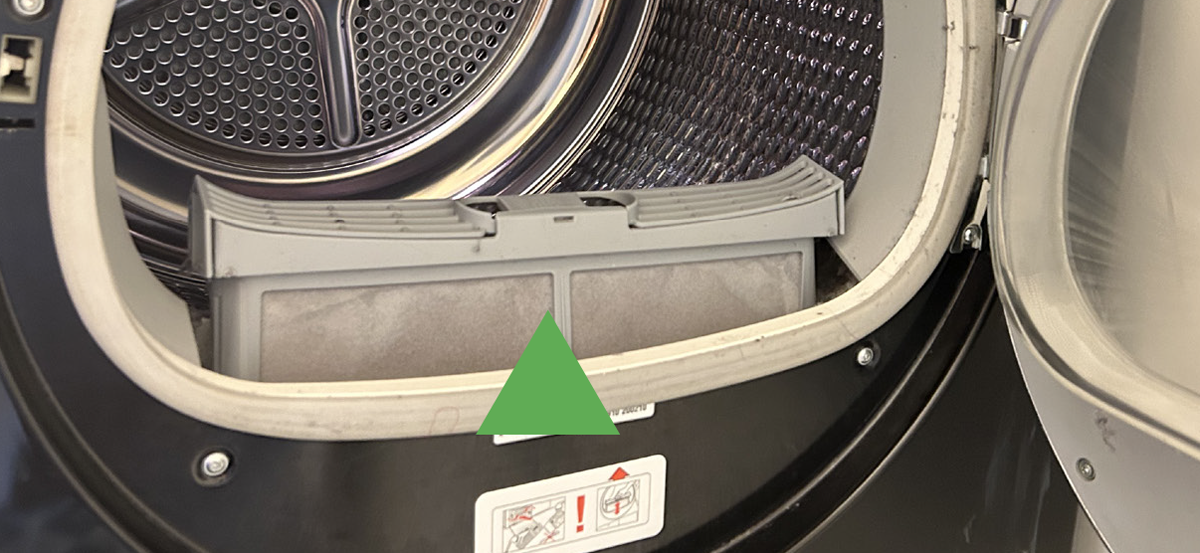
– If the dryer has been used several times, be sure to empty the filter for better performance.

– If the dryer stops and displays a flashing snowflake icon on the front panel, empty the filter.

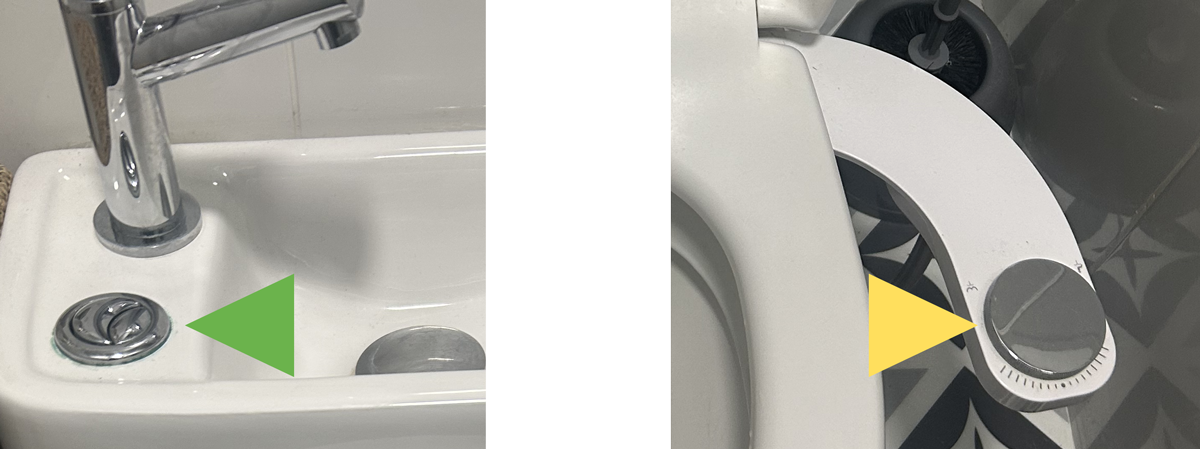
In the restroom, use the buttons next to the faucet (green arrow) to flush the toilet. The round button (yellow arrow) on the left when you’re sitting down is a bidet; be sure to return the button to the center after using it.

In the neighborhood

Our favorite restaurants nearby.

See more restaurants in the area

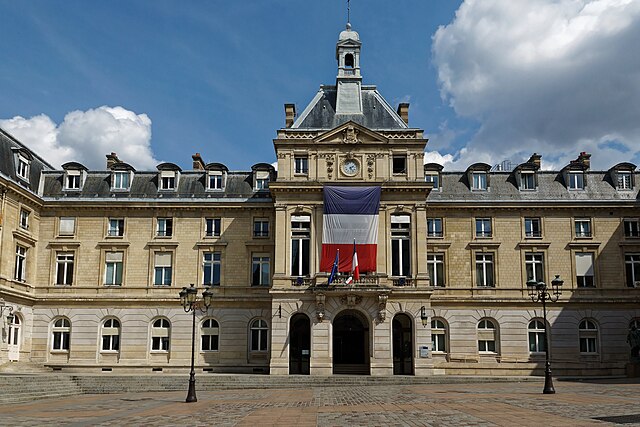
15th arrondissement town hall
A beautiful neo-renaissance building.
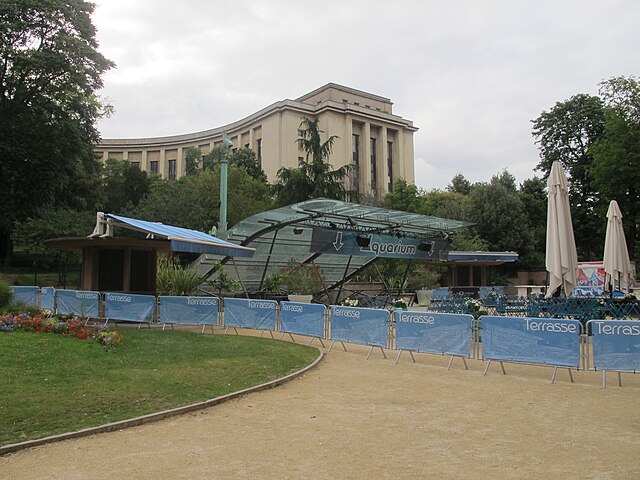
Aquarium de Paris
You'll find a fine collection of sharks!
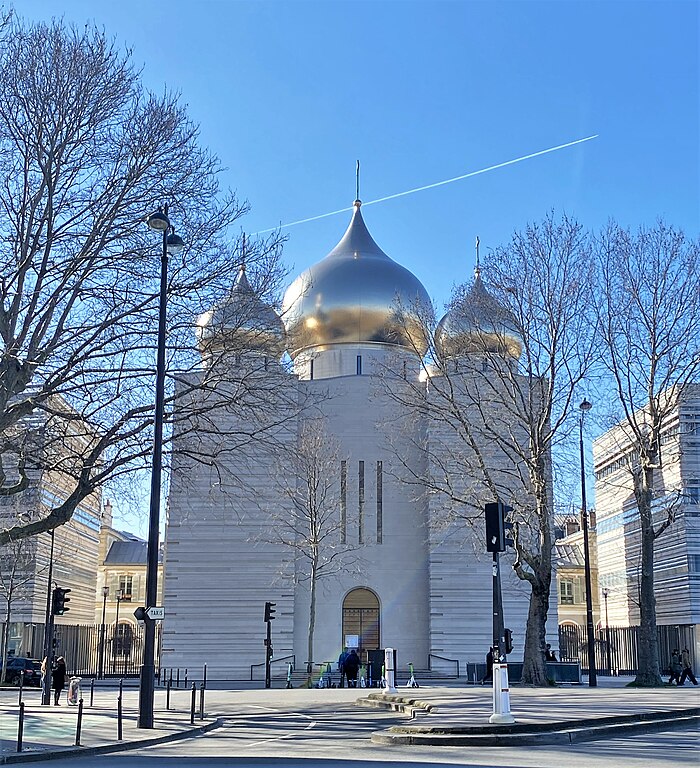
Cathedral of the Holy Trinity
Paris Orthodox Cathedral, with its five bulbs covered in an alloy of gold and palladium.
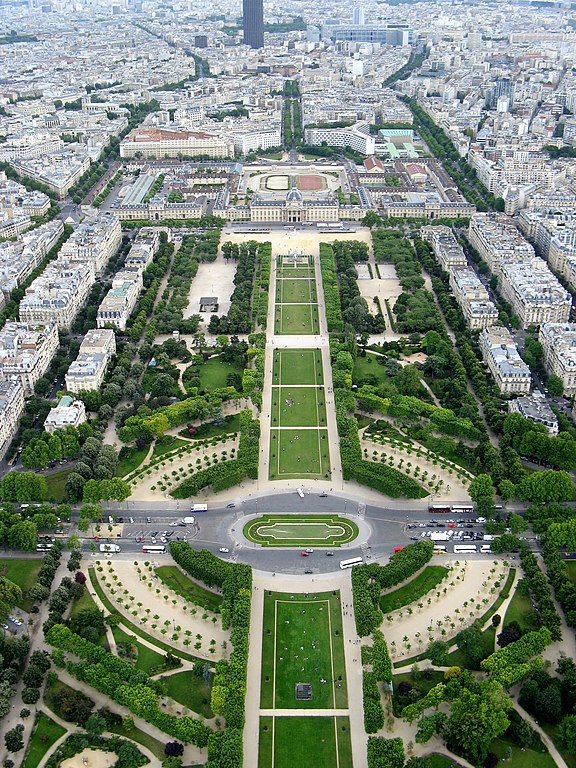
Champ-de-Mars
A plain for market gardening, which became the training camp for the École Militaire in the 17th century.
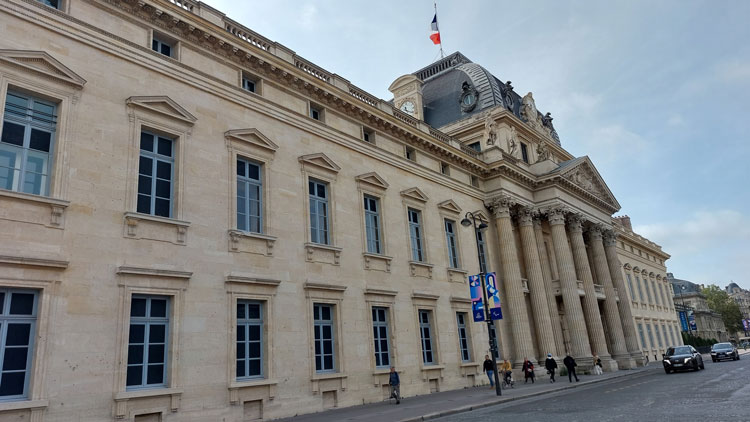
École militaire
Founded by Louis XIV for the children of the aristocracy.
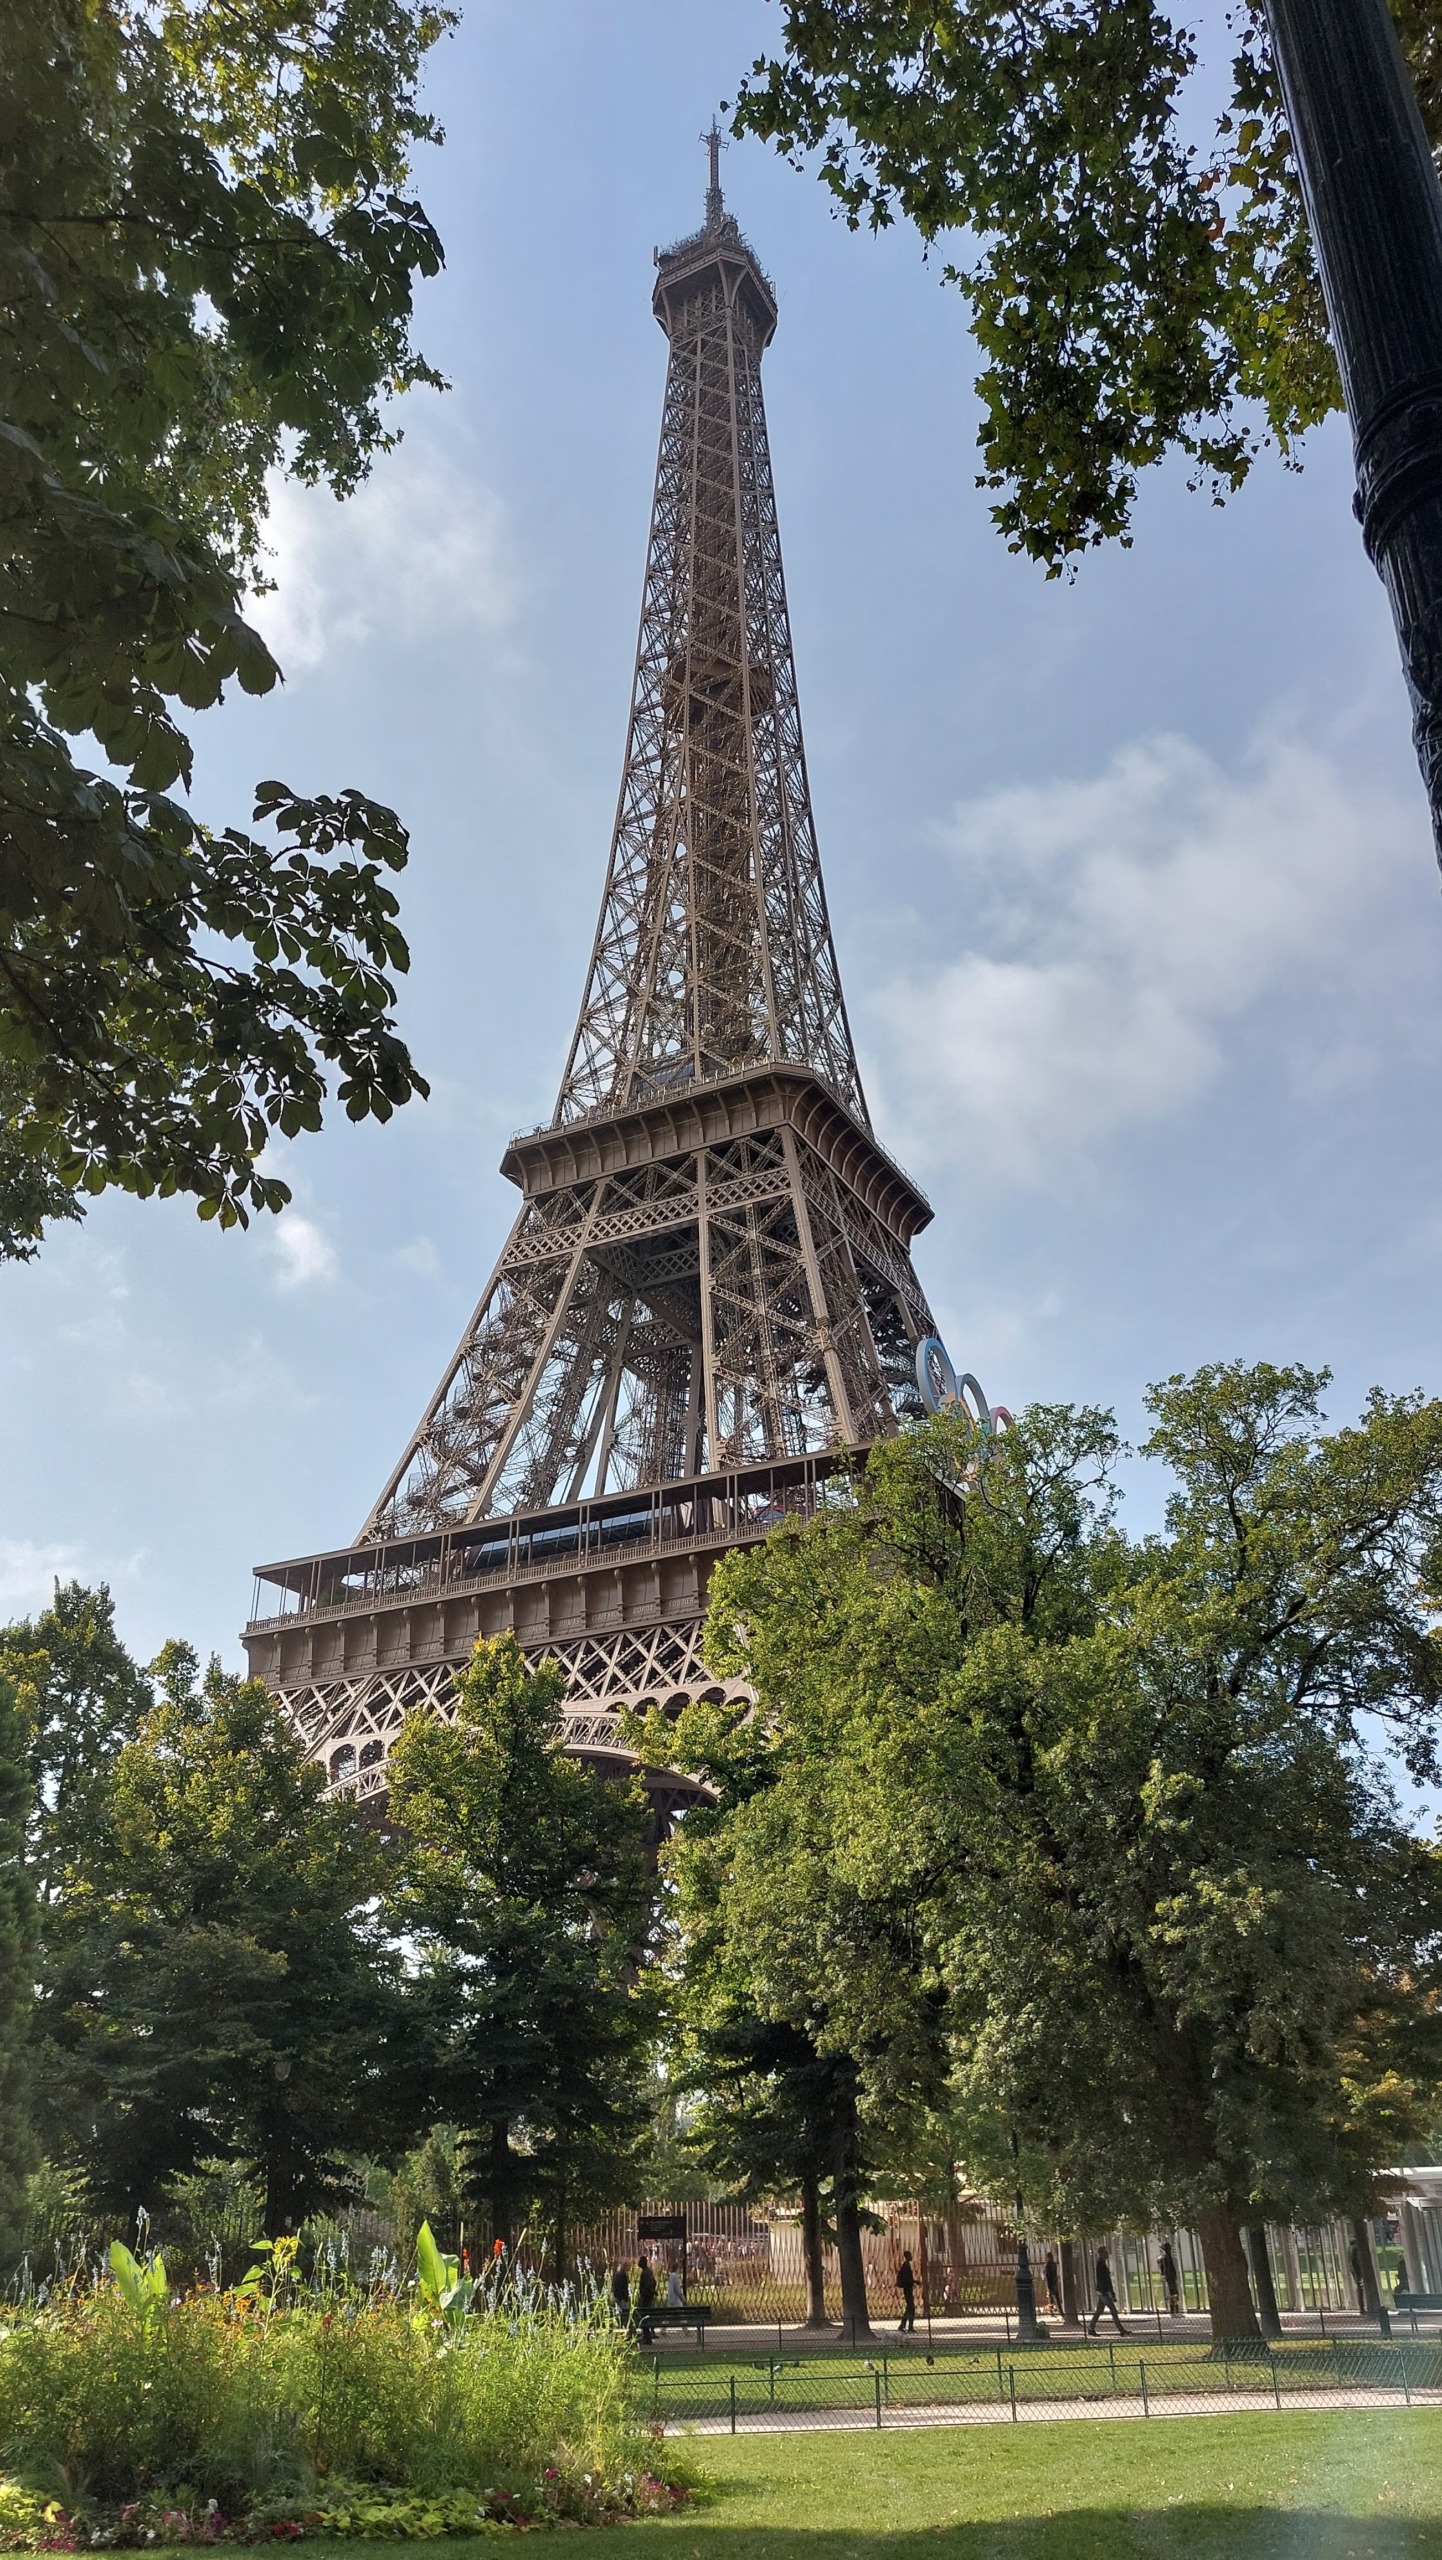
Eiffel Tower
The Grande Dame needs no introduction. But do you know how much she weighs?... 10,100 tonnes.
Hôtel national des Invalides
It was a hospice, barracks, convent, hospital and factory under Louis XIV. Today, the Musée de l'Armée.
Human Rights Monument
Work by sculptor Ivan Théier.
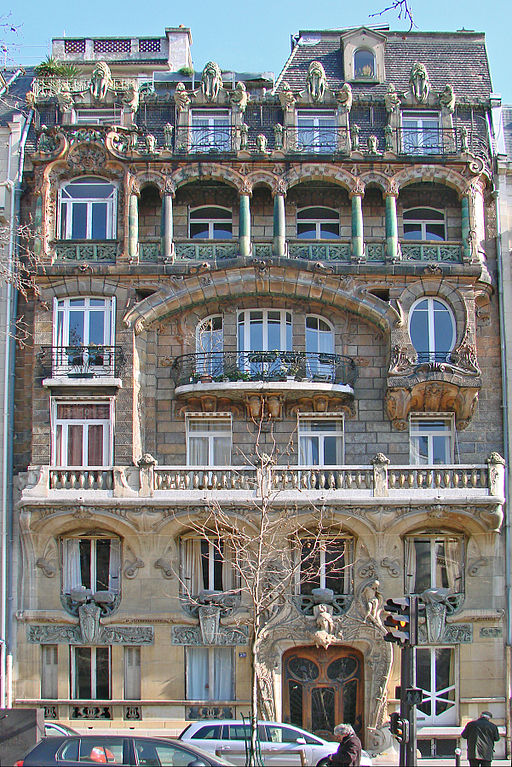
Lavirotte building
One of the finest examples of Art Nouveau architecture in Paris, built between 1900 and 1901.
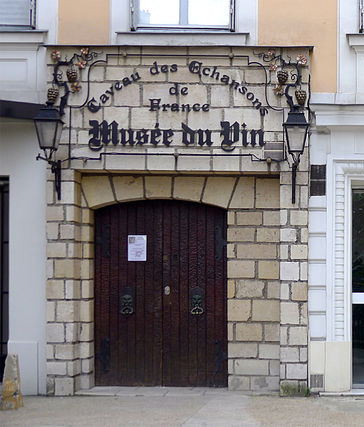
Le M. Musée du vin
Over 1,000 m2, with 15th-century vaulted cellars, dedicated to the world of wine and gastronomy.
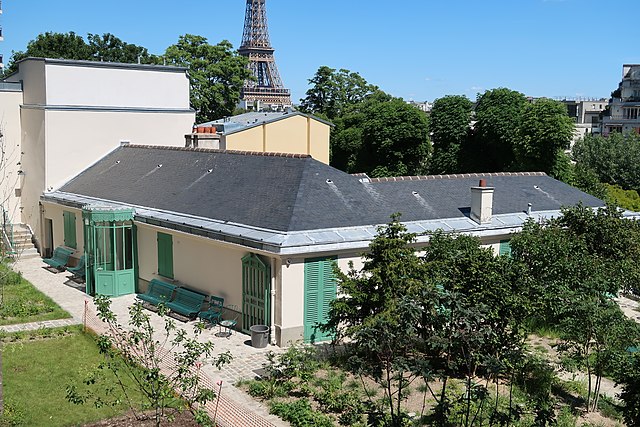
Maison de Balzac
Museum dedicated to the writer in a house he lived in between 1840 and 1847.
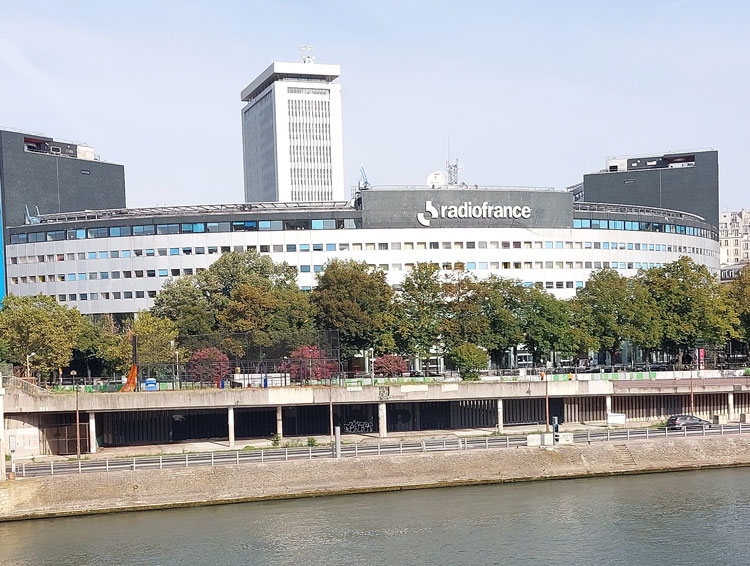
Maison de la Radio et de la Musique
Headquarters of French public radio with concert halls and restaurant.
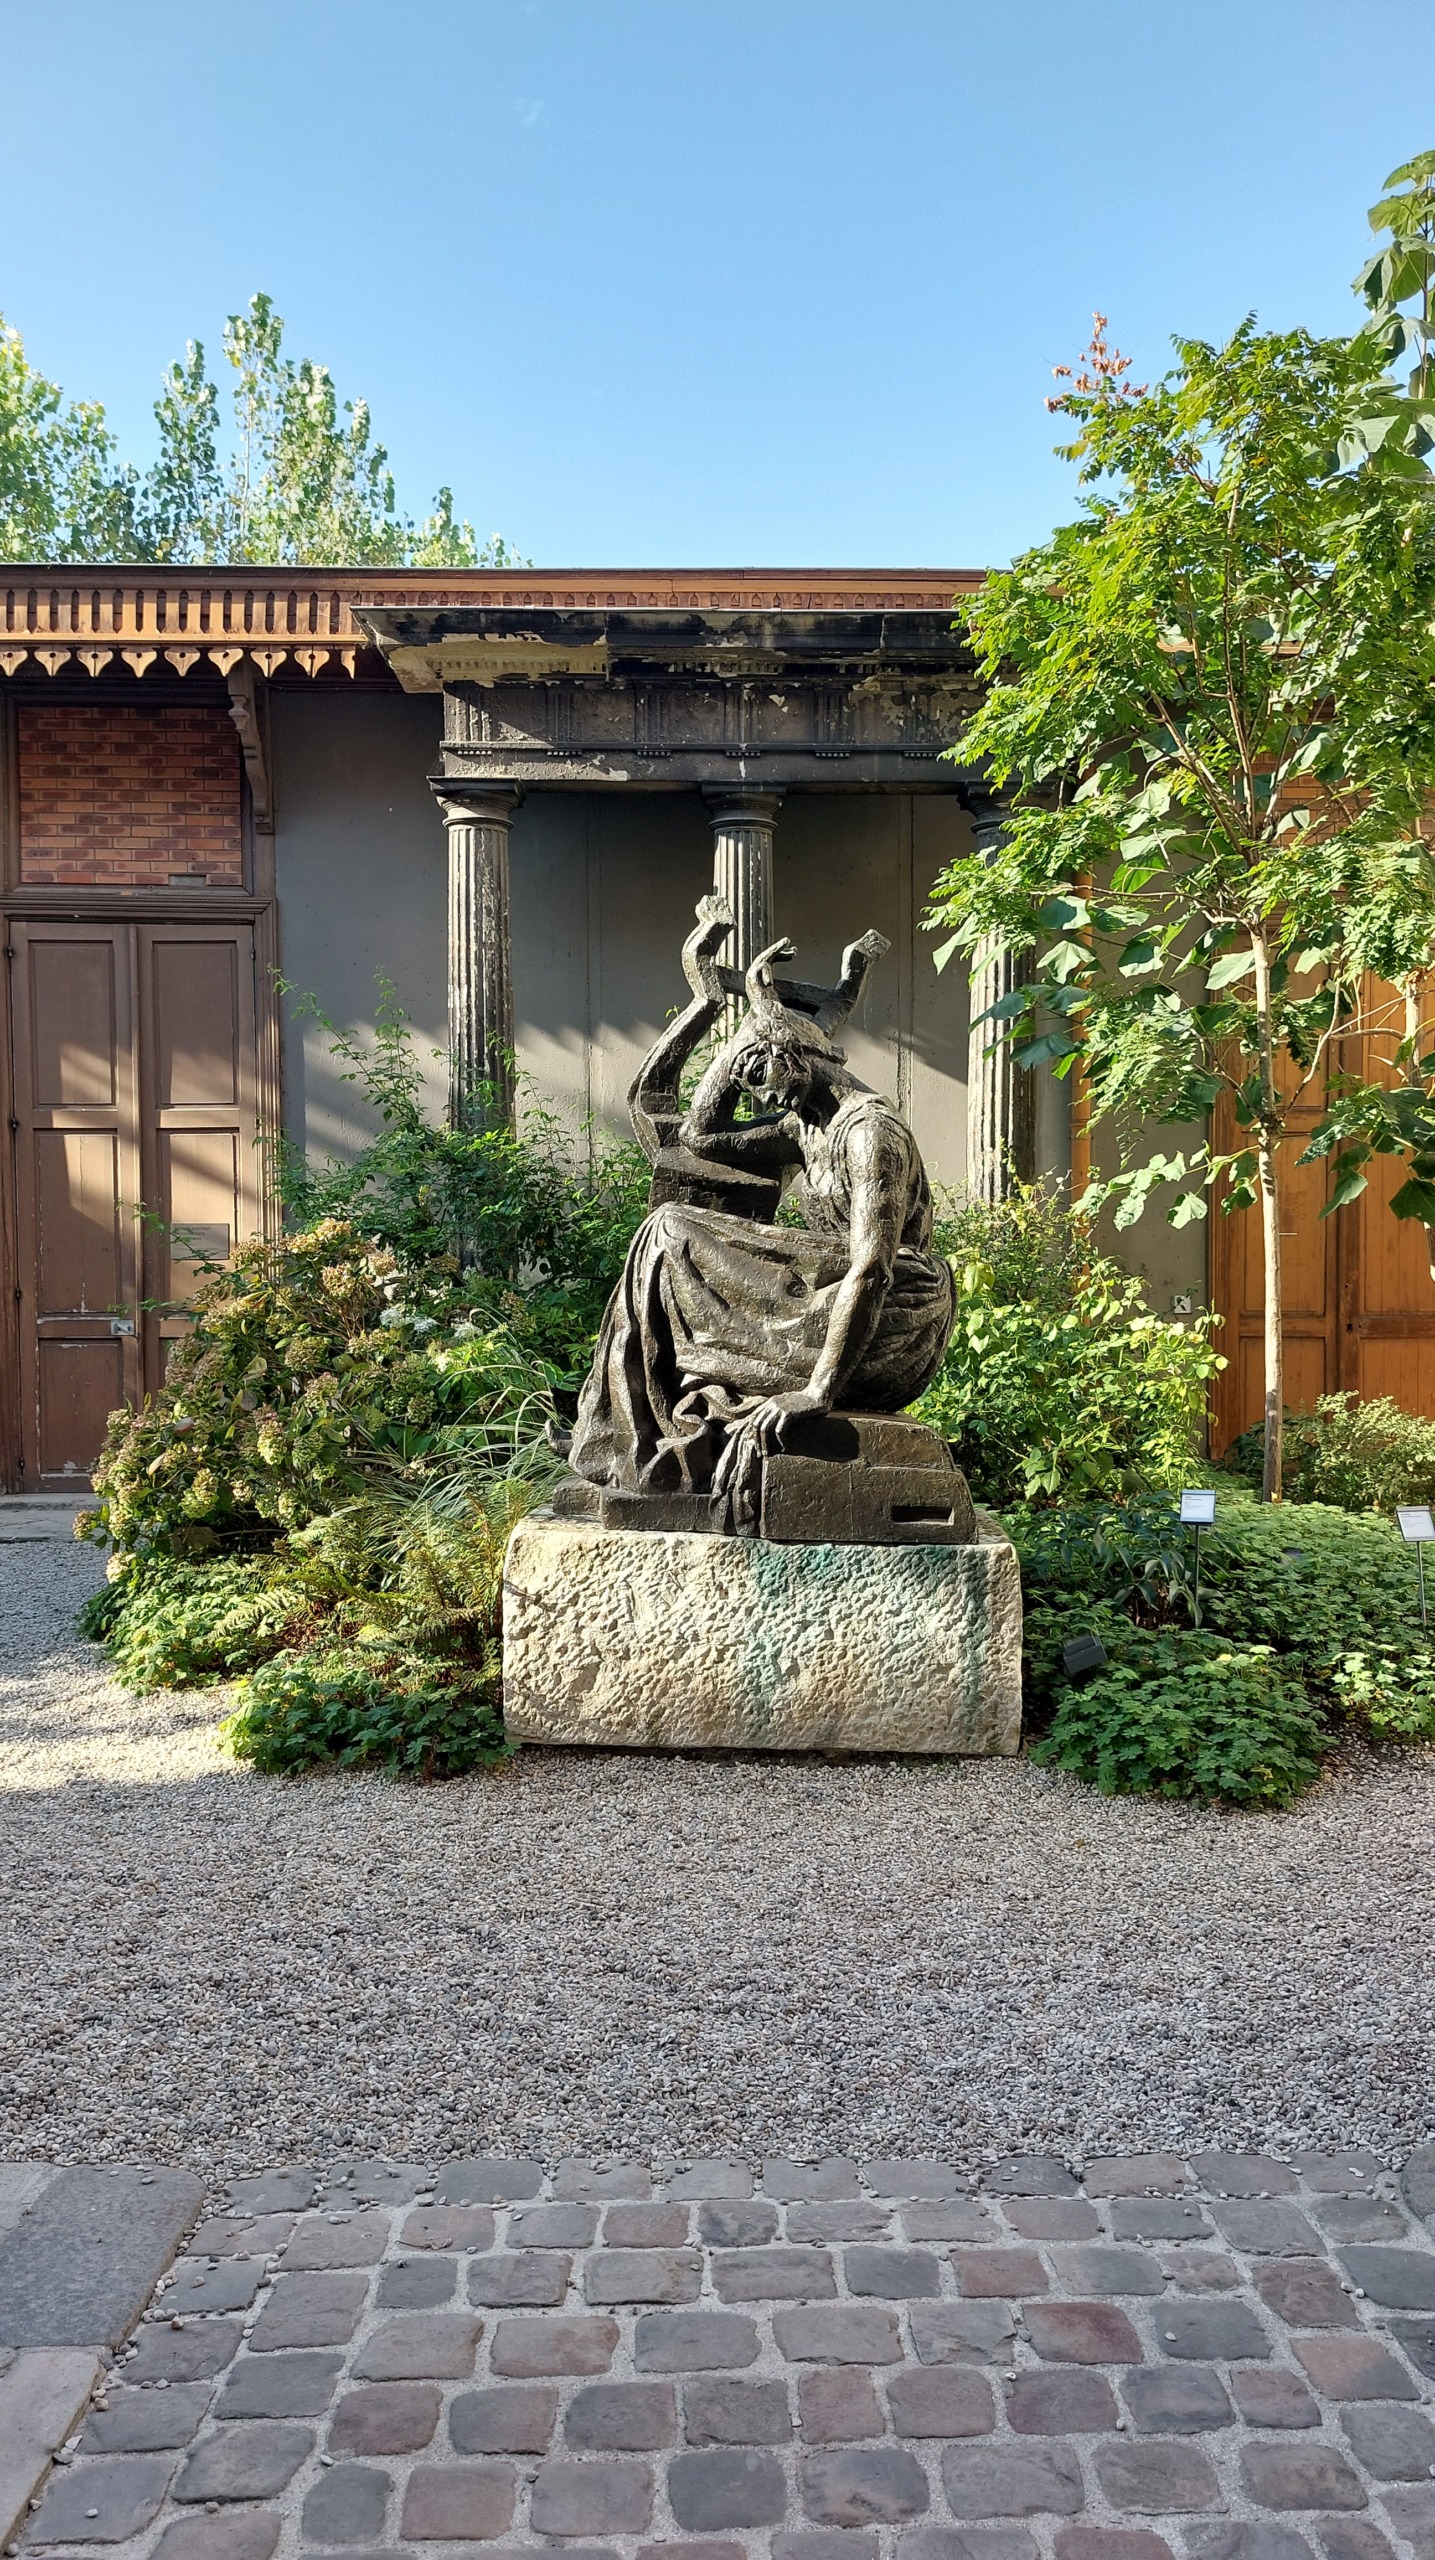
Musée Bourdelle
Le sculpteur Antoine Bourdelle (1861-1929) vécut et travailla là. Nombreuses oeuvres de l’artiste.
Musée Clemenceau
The Tiger's flat, as it was on the day he died in 1929.
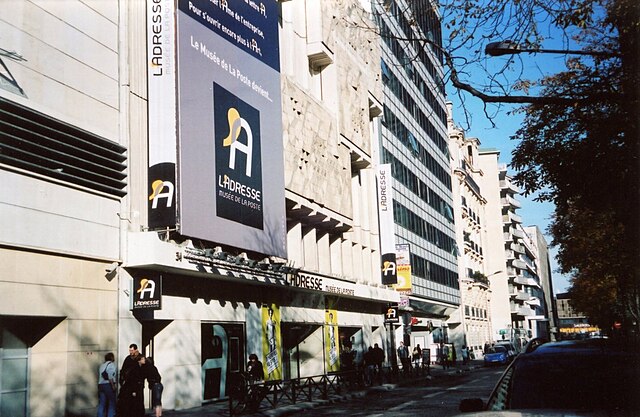
Musée de la Poste (Postal Museum)
You'll find out all about the world of mail (and there's a lot to discover).
Musée des Égouts
The history of sewers from Lutetia to the present day.
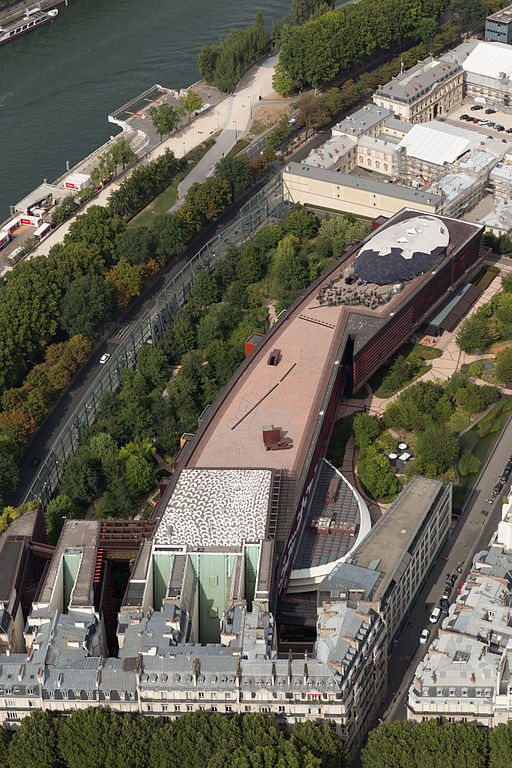
Musée du Quai Branly-Jacques Chirac
A museum dedicated to the arts of Africa, Asia, Oceania and the Americas.
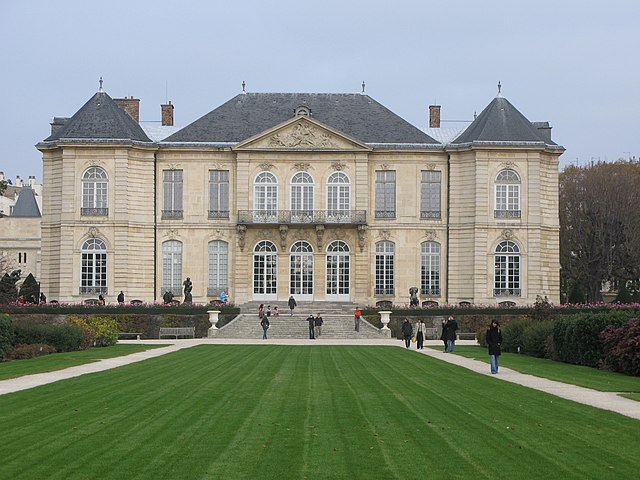
Musée Rodin
One of the most charming museums in Paris. Romantic garden with sculptures and café.
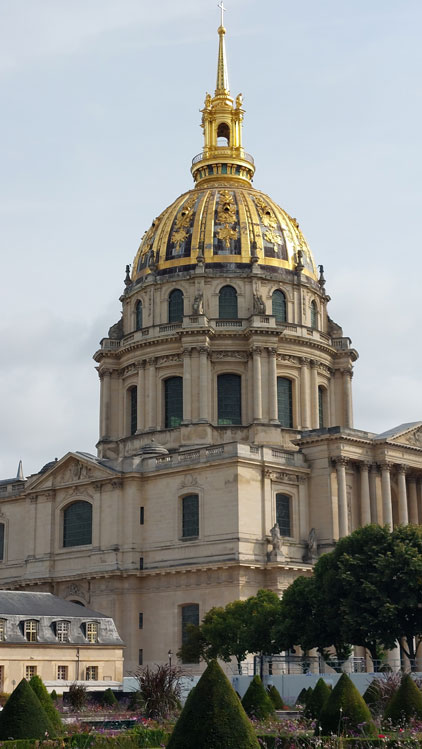
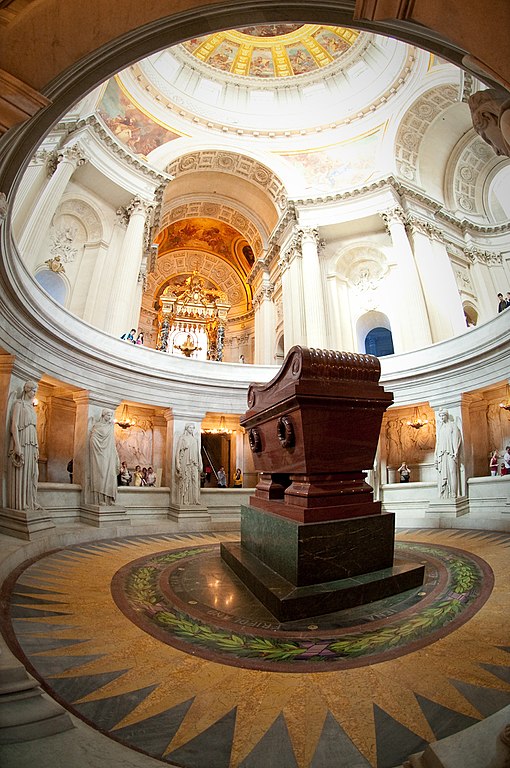
Napoleon’s tomb
The Dôme des Invalides, accessible from the Musée de l'Armée, has housed the Emperor's tomb since 2 April 1861.
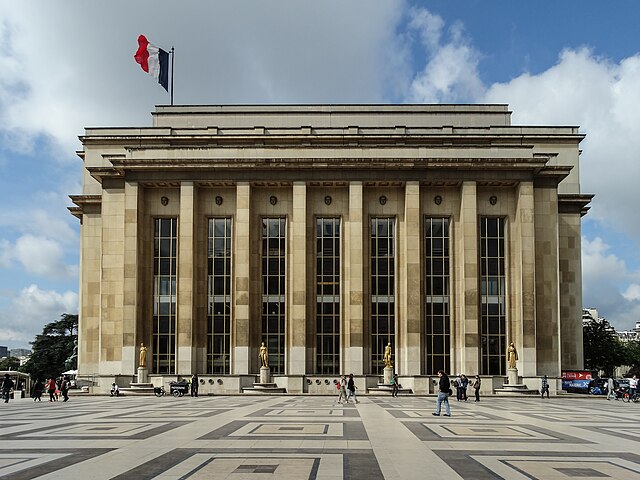
Palais de Chaillot
Built in 1937 for the Universal Exhibition. Home to three major museums: the Cité de l'Architecture et du Patrimoine, the Musée National de la Marine and the Musée de l'Homme.
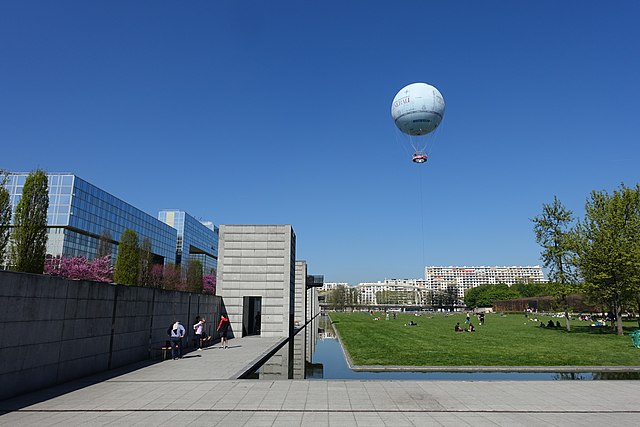
Parc André-Citroën
Park established on the site of the former Citroën factories.
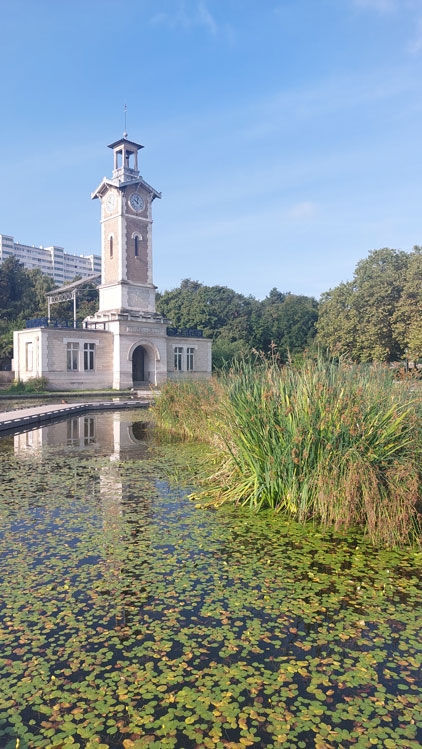
Parc Georges-Brassens
Antique book sales at weekends.
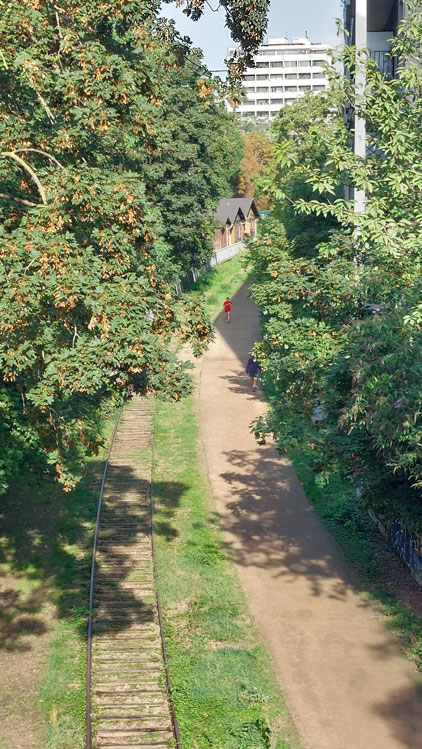
Petite ceinture du 15e
Former railway line converted into a green promenade.
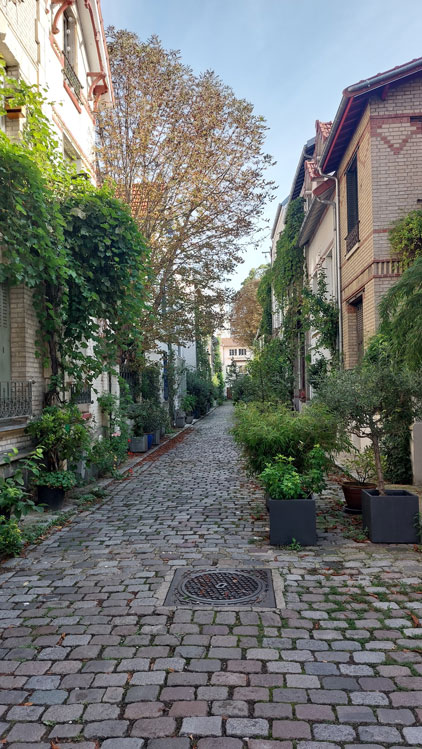
Rue Villa Santos-Dumont
A line of beautiful houses.
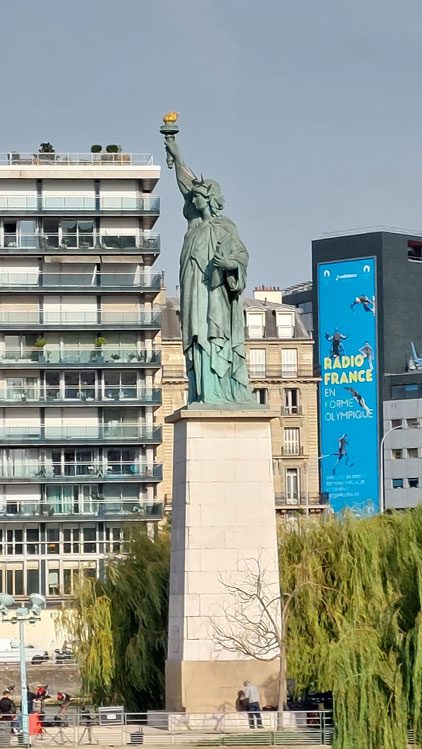
Statue of Liberty, île aux Cygnes
Replica of the famous New York statue, donated by the United States to France.
To go further
Until
20 December
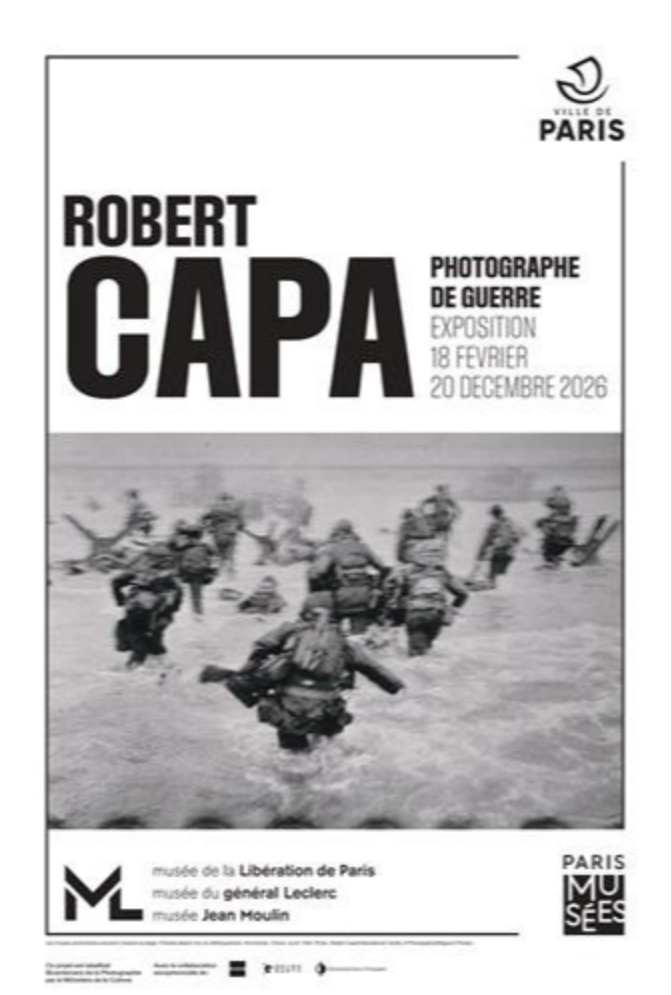
Robert Capa. War photographer
A collection of 160 items (60 vintage press prints, magazines, documents, and personal belongings) that trace the journey of this young Hungarian immigrant who became an icon of modern photography. As a committed witness, Robert Capa shaped the new image of the war photographer.
Musée de la Libération de Paris – Musée du général Leclerc – Musée Jean Moulin - 4 avenue du Colonel Henri Rol-Tanguy, Paris (map)
Until
10 January
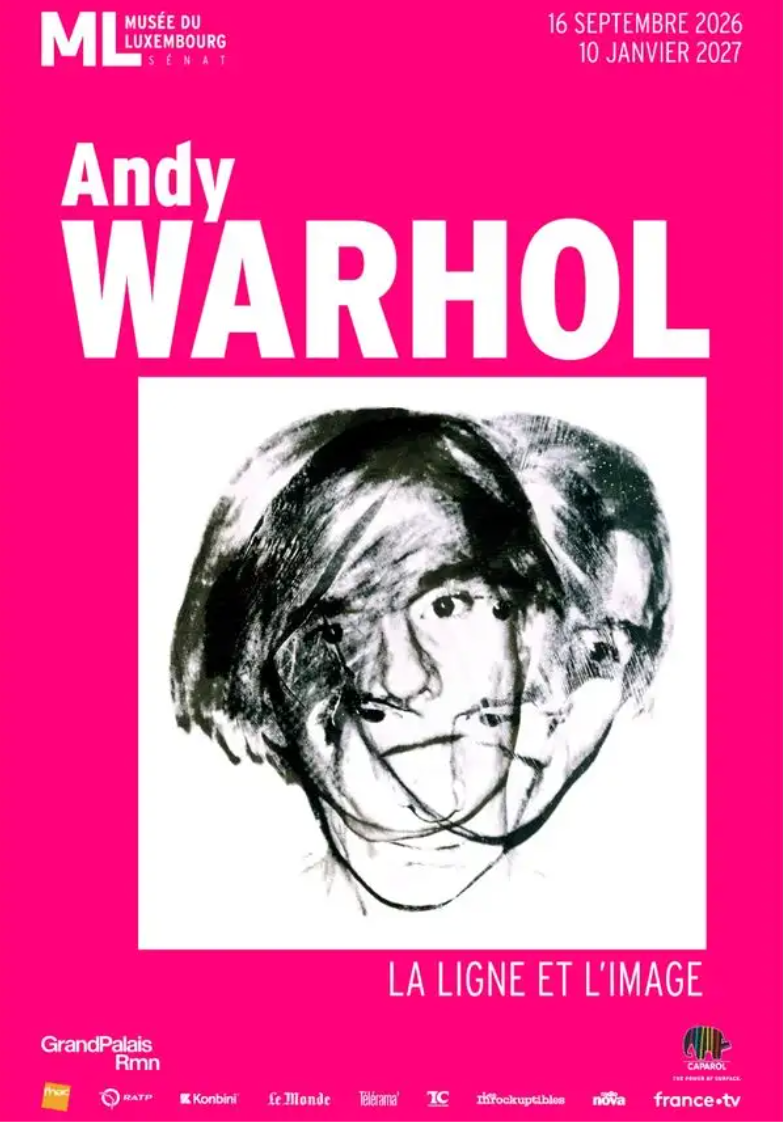
Andy Warhol. Line and Image
Through this exhibition (featuring nearly 150 drawings, along with paintings, photographs, silkscreen prints, and archival documents), discover the essential role of drawing in the American artist’s work, as well as his relationship to portraiture, writing, and death…
Until
17 January
Cézanne and us
From Paul Gauguin to Peter Doig, including Henri Matisse, Pablo Picasso, Piet Mondrian, Joan Mitchell, Bridget Riley, and Etel Adnan: nearly 180 works trace how Paul Cézanne’s work has been discovered, interpreted, and transformed, from the late 19th century to the present day.
Until
24 January
Timeless Tintoretto
For the first time in France, a comprehensive overview of Tintoretto’s entire career. In all, some forty paintings and drawings by one of the leading figures of the Italian Renaissance, who took his name from his father’s trade (dyer, or “Tintoretto” in Italian).
Until
31 January
Auguste Bartholdi. Liberty Enlightening the World.
An exhibition, combined with an immersive virtual reality experience, dedicated to one of the leading figures in 19th-century French sculpture. It explores the origins of the Statue of Liberty, an allegorical figure celebrating American independence.
6 October
-
31 January
Mary Cassatt, Being independent
A major exhibition dedicated to Mary Cassatt, an active member and one of the leading figures of the Impressionist movement, to mark the centenary of her death. The approximately 80 paintings, pastels and prints on display span the entire career of this fervent advocate of independence.
Back to the room directory